
Good morning! Happy WEEKEND! John and I are finishing up here at the cabin before we head home later this afternoon. I can’t believe we’ve almost been here a full week! This is the longest we’ve been up here thus far working on “Ever After Wonderland” and we’ve gotten a ton done this week!
Kitchen Tile Floor- DONE!
Finish Installing Black Glass KitchenCabinet Doors- DONE!
Stairwell Shiplap Wall- DONE!
Install Second Living Room Chandelier- DONE!
Master Bathroom Cabinet Doors- DONE!
Add Second Guest Bedroom Bed & Style- DONE!
Lots more to do of course but we made great progress this week! Quite a few of these projects will be on the blog next week as well!
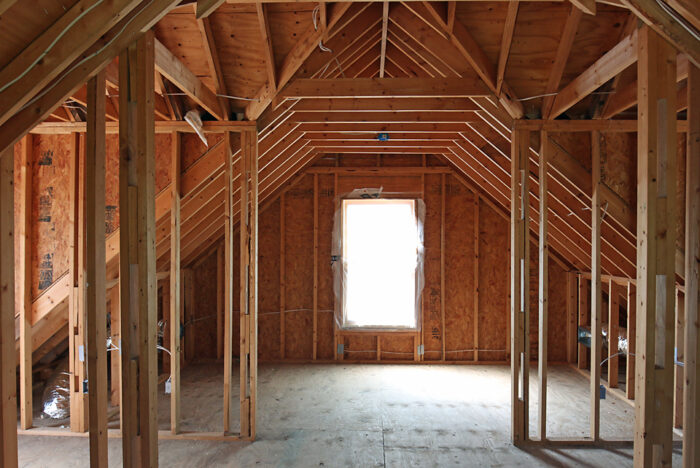
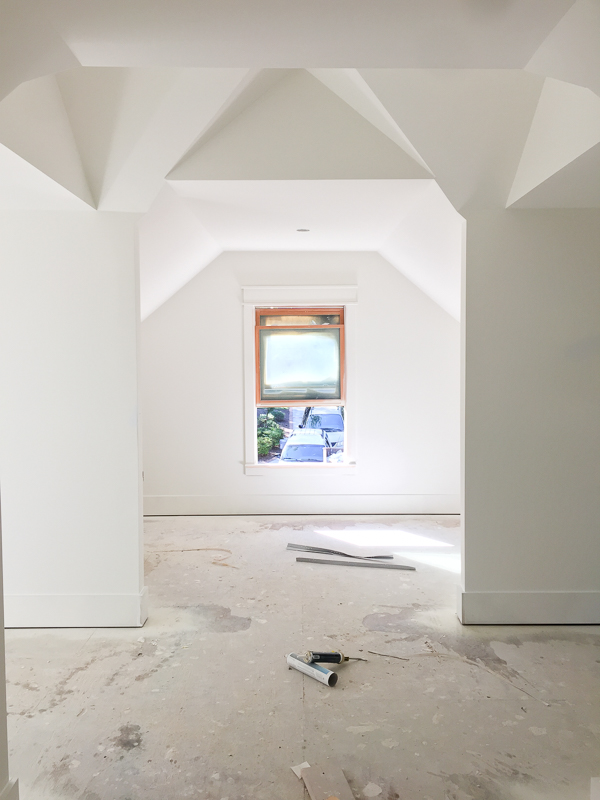
Today I am sharing a project in the boy’s garage apartment that John and I started tackling several months ago actually! We kind of piddled with completing it a bit between everything else we have going on but I am happy to report that it is COMPLETE! I wanted to make sure and share the project today because we will be styling his bedroom early next week for the next reveal in his space. Hoping to complete both of the boy’s rooms in the next month or two. First, let’s take a peek back at Zach’s space BEFORE (it’s the second floor of our finished, heated/cooled garage)…
Before…

The Process…
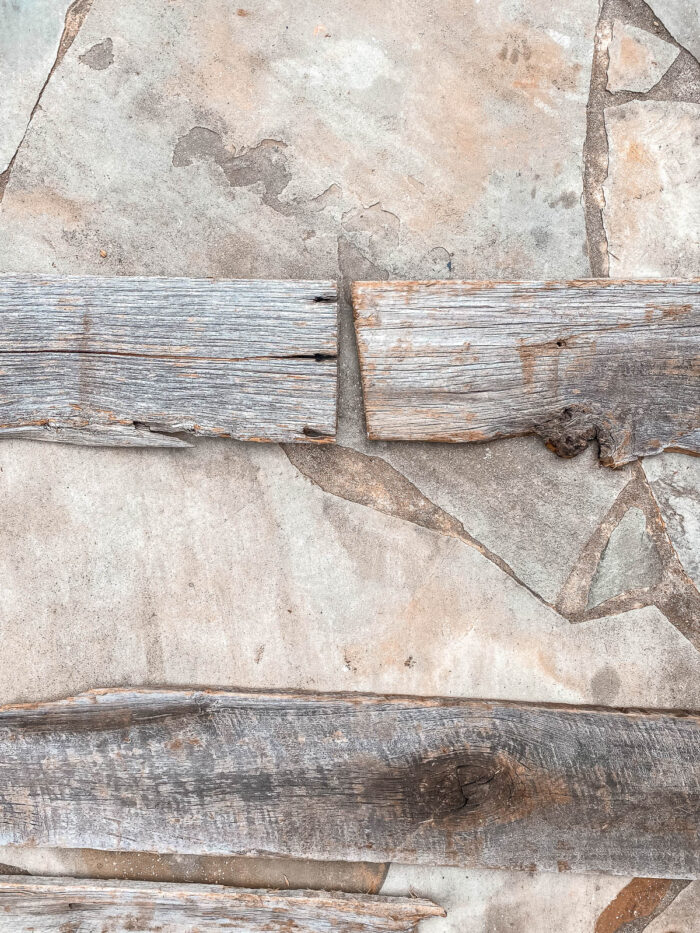
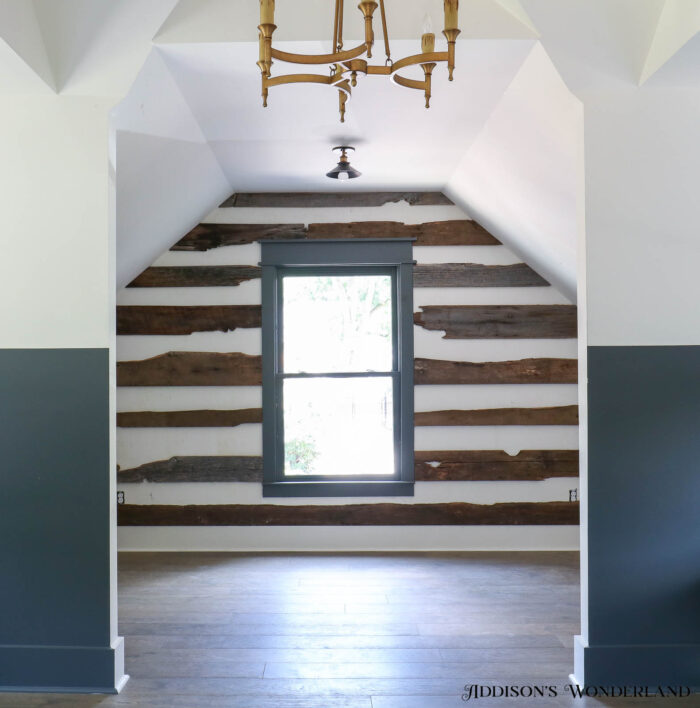
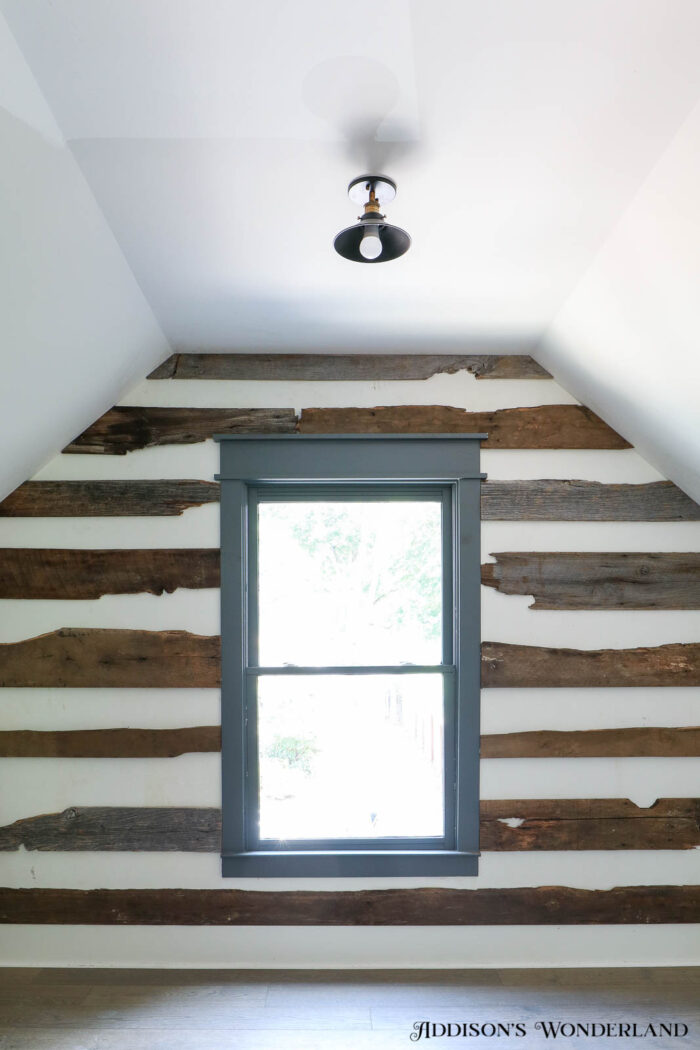
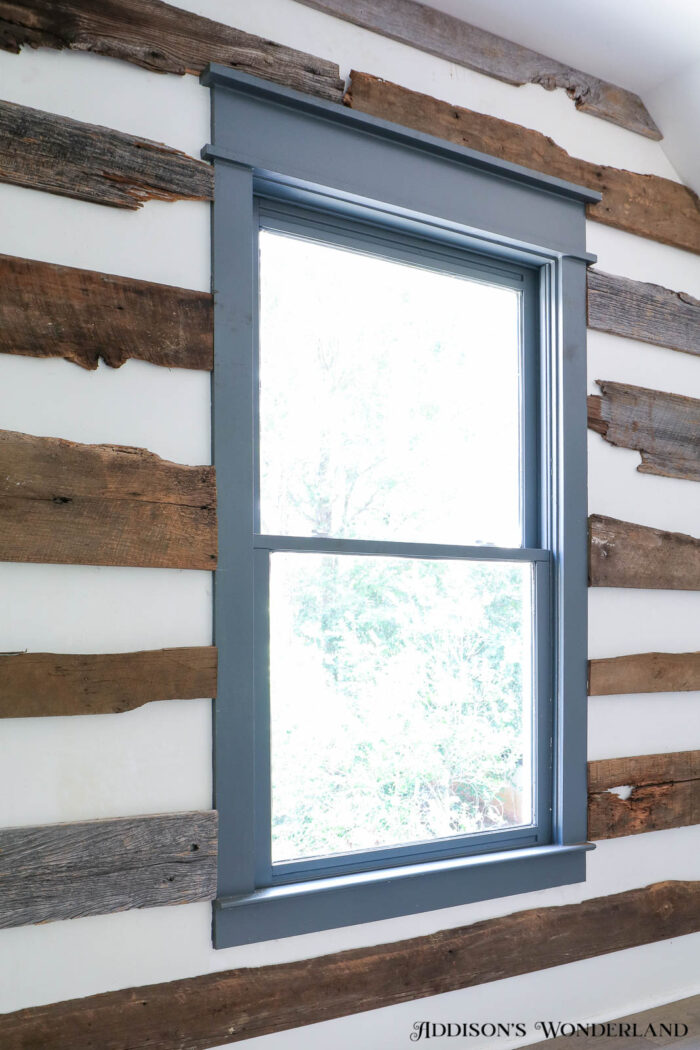
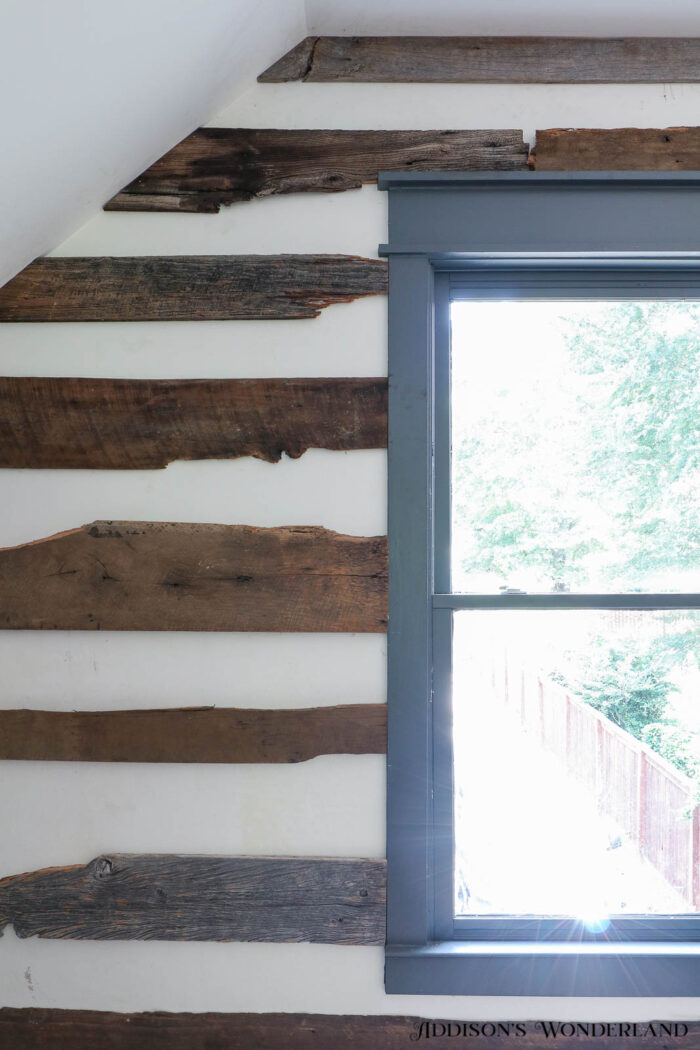
As you may have seen several times now on my Instagram stories, John and I love to frequent a local reclaimed wood store called a Rustic Roots. It’s in a beautiful old cotton gin building walking distance from our home in our cute little historic downtown and John is like a kid in a candy store every time we stop by! This trip was all about creating a rustic wood wall in Zach’s bedroom. This wall was covered in beautiful wallpaper while it served as Abigail‘s apartment and then we recently took it down to convert it into Zach’s bedroom. I had this vision of finding really raw shaped pieces of wood that would be separated by white wall space that almost looked as if they’ve been mortared into the wall. Here’s a quick peek at our shopping trip and selecting those boards…

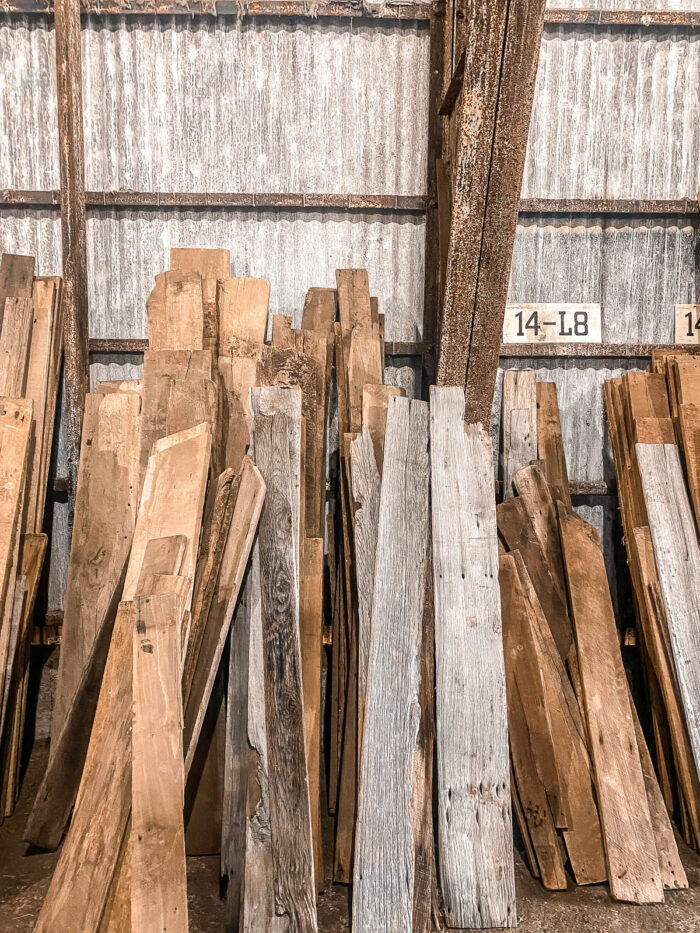
My Faves…
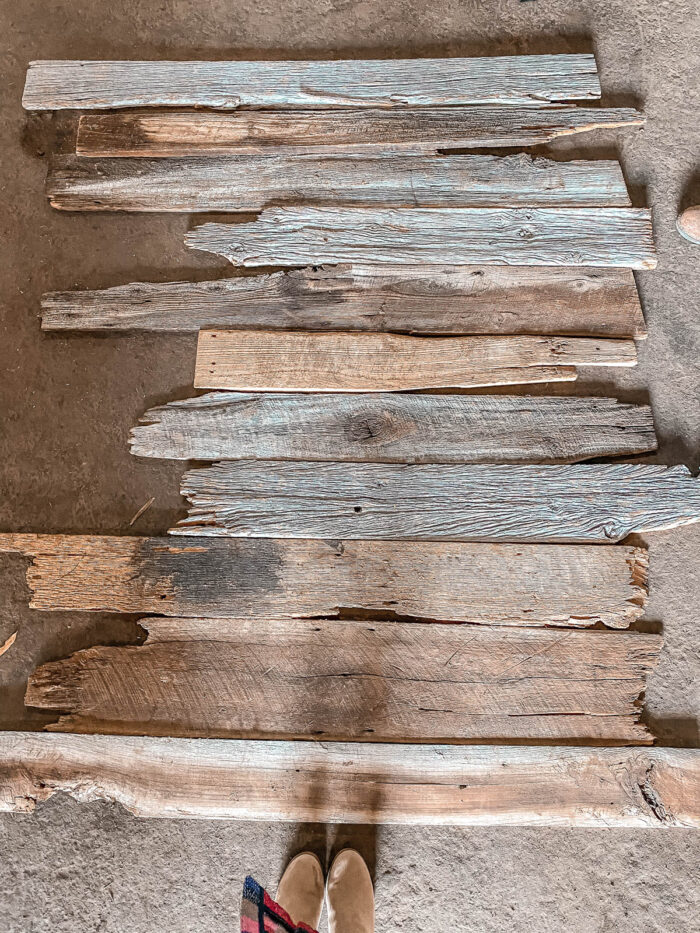
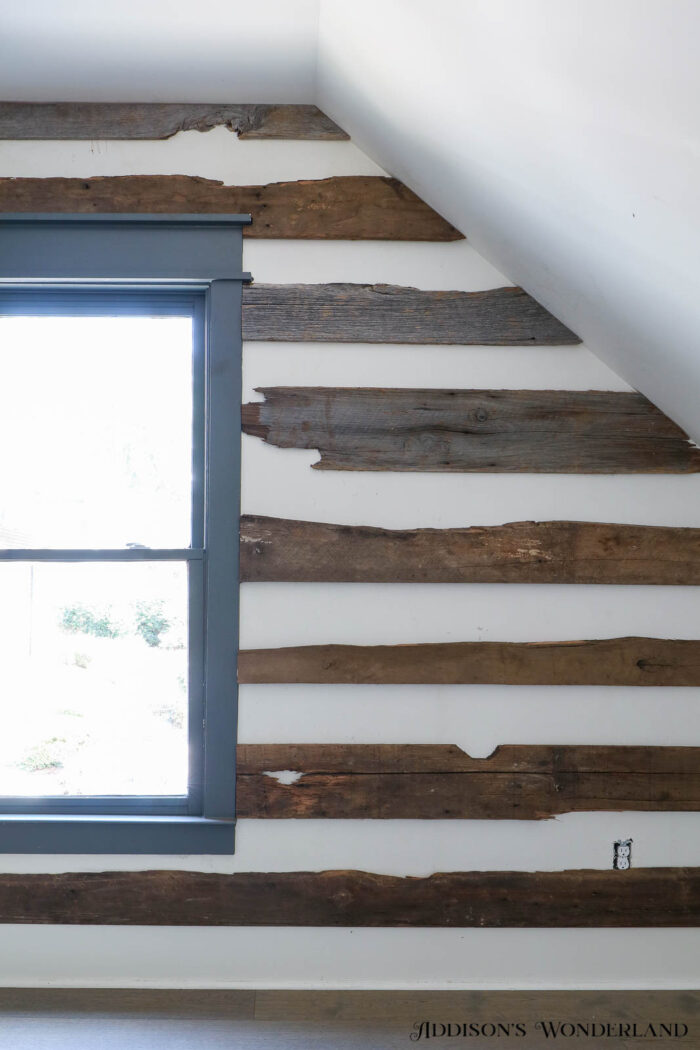
We purchased and loaded up quite a few and headed home to make a plan! The most difficult part of the project was figuring out ways to do spanses of wall longer than the boards. I thought it looked best to intertwine two raw edges than two straight cuts…
Yes!
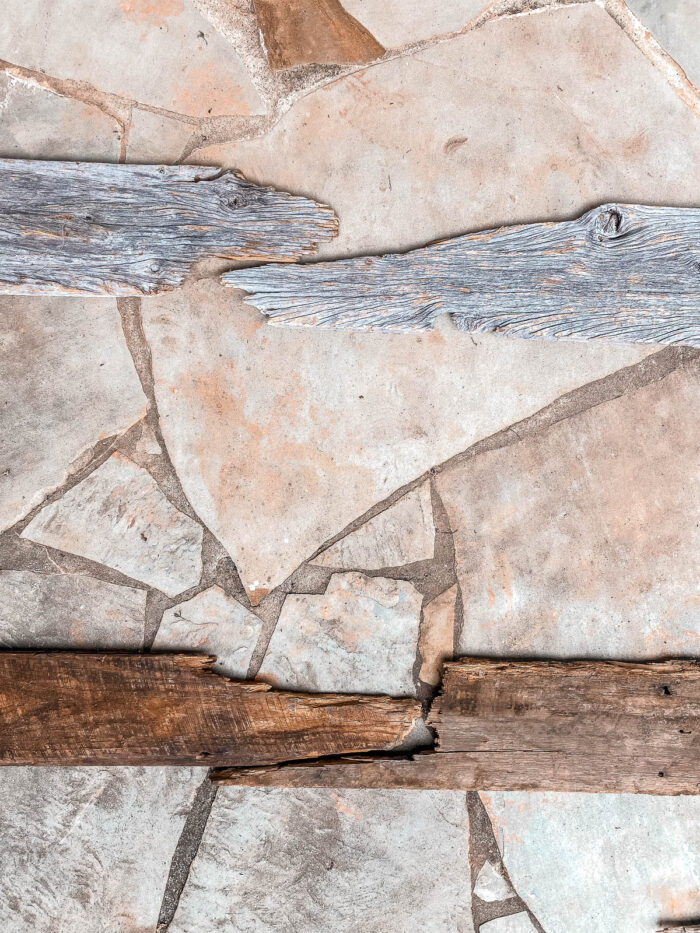
Nope!
A Fun Little Install Video…
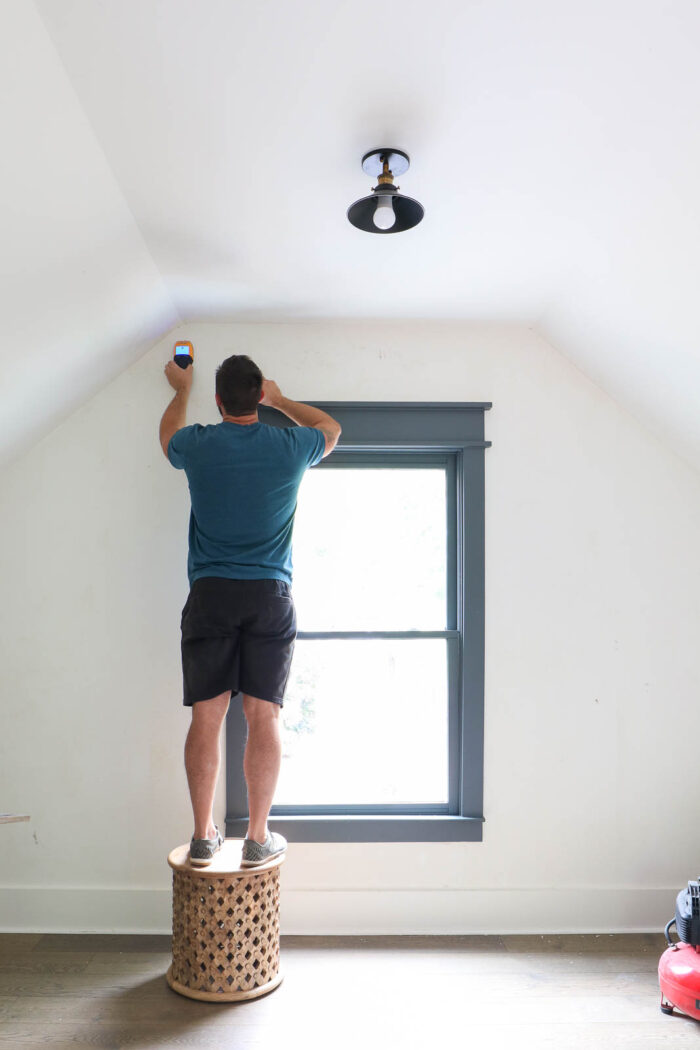
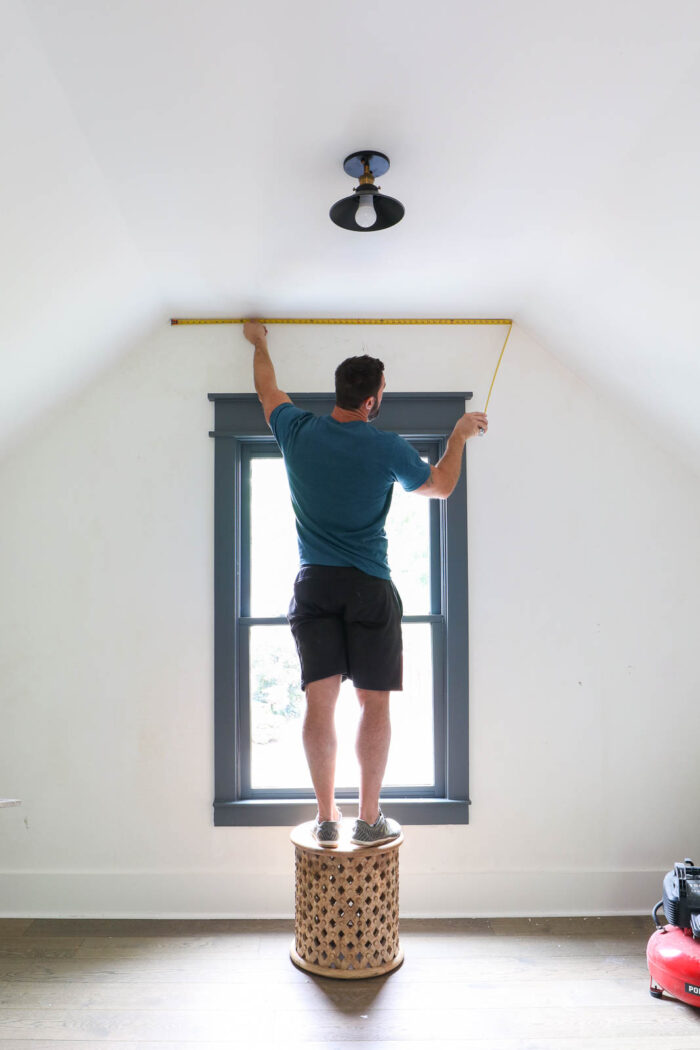
Step One…
Make a plan and mark for studs! First, I would suggest measuring the ceiling height, measuring the width of each wood piece and then making a plan for spacing. It’s much easier to determine on the front end rather than eyeing each piece and then ending up with too much or too little space at the bottom for the final piece. John then marked the studs along that plan so he would know where to nail in each piece of wood…
Step Two…
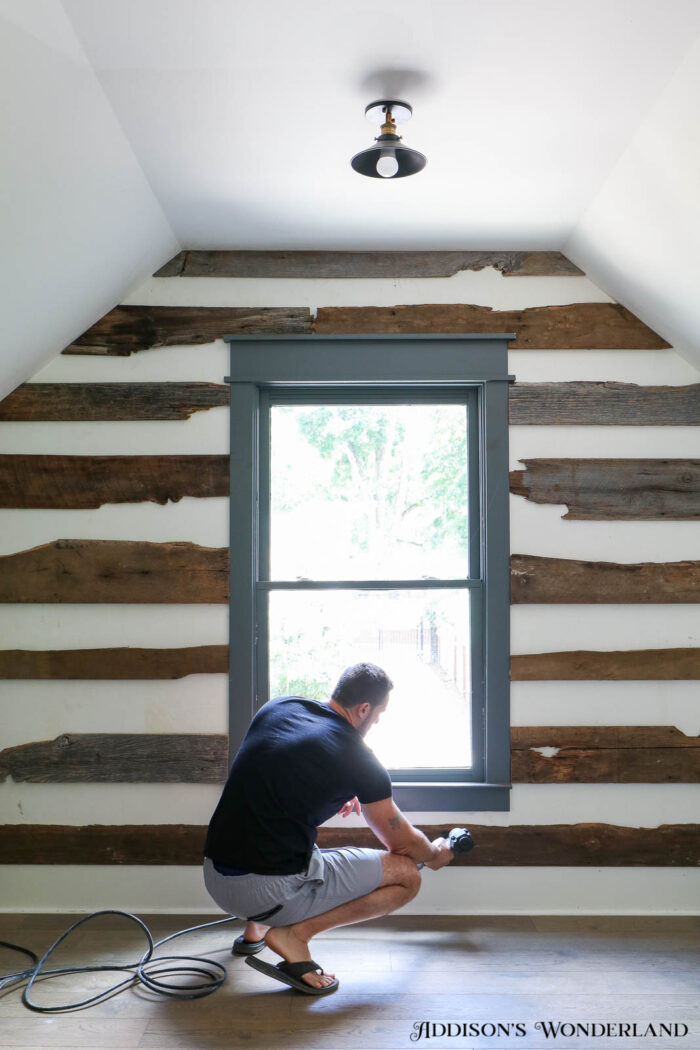
Measure and cut! John chose to start at the ceiling because the angled pieces are the most difficult to plan and cut…
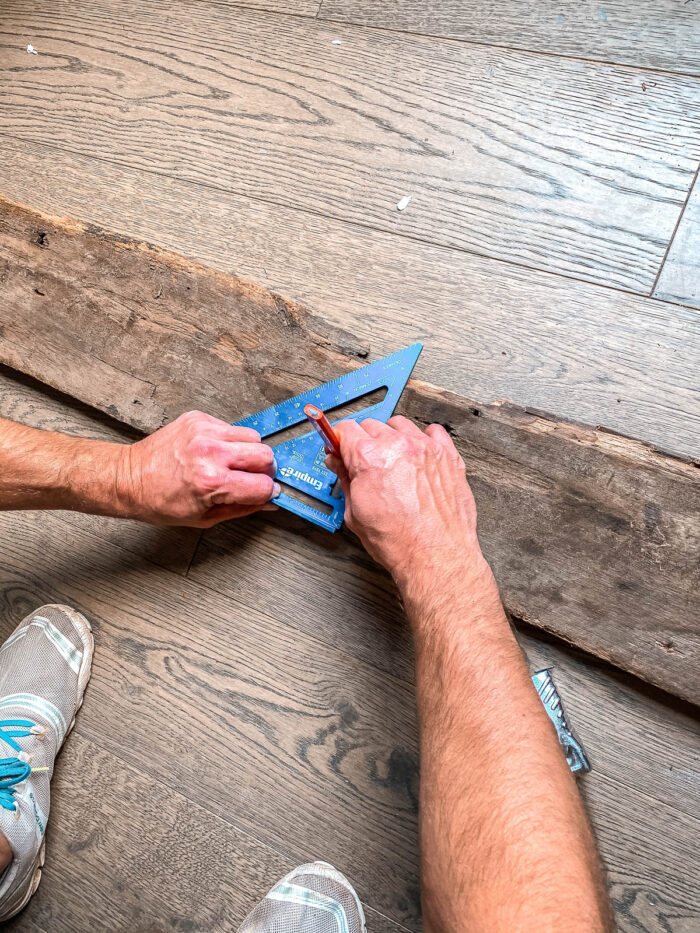
John marked each cut and then used a jigsaw to make all of the cuts. You can also use a circular saw but since this was rougher wood with a very non-smooth surface, he found that a jigsaw worked much better.

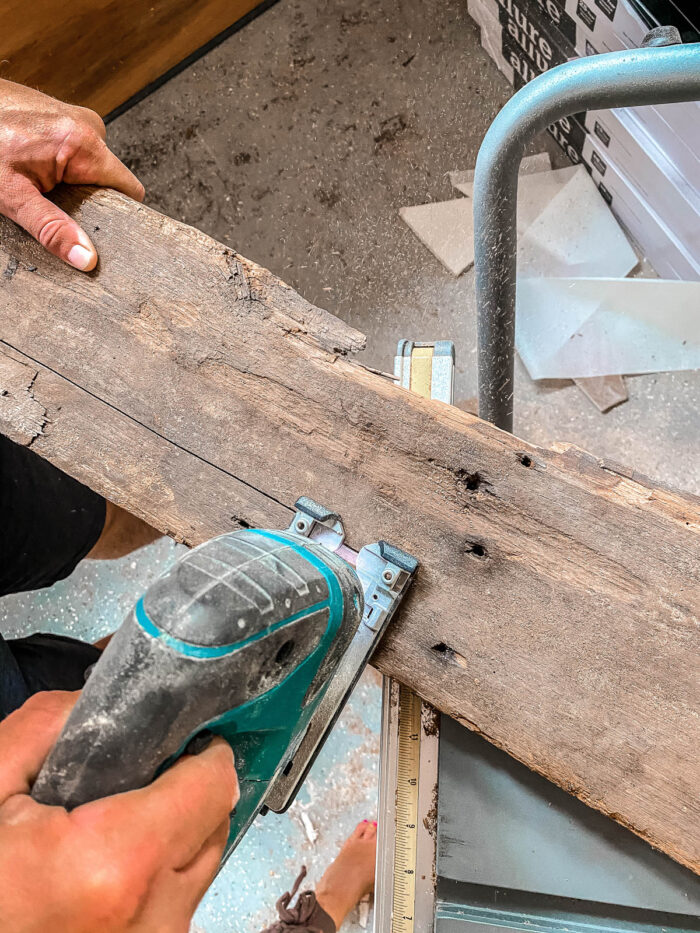
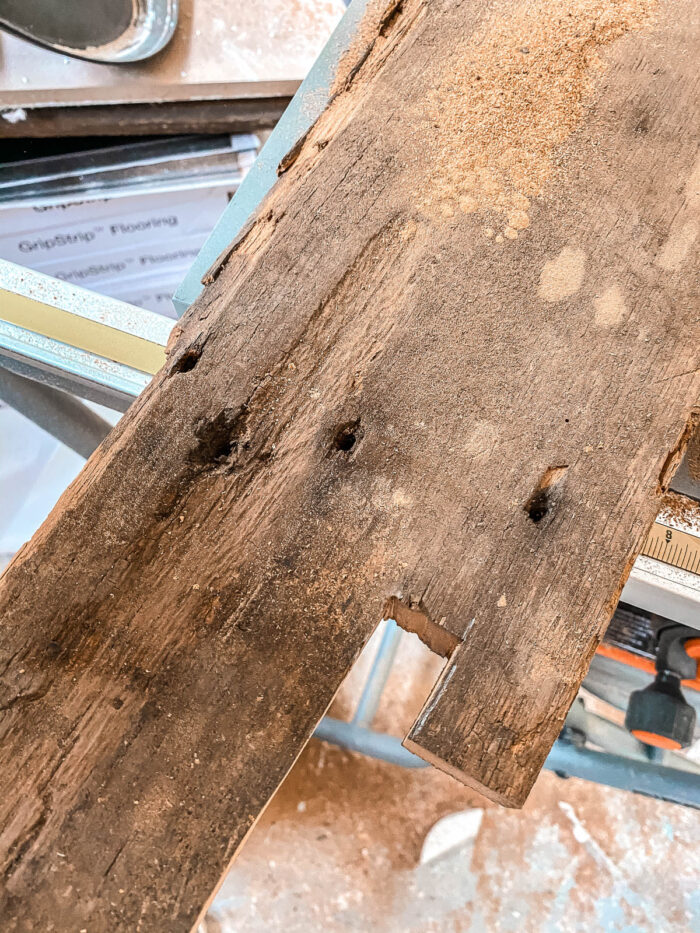
Some pieces needed multiple cuts to fit wall angles and around trim…
Step Three…
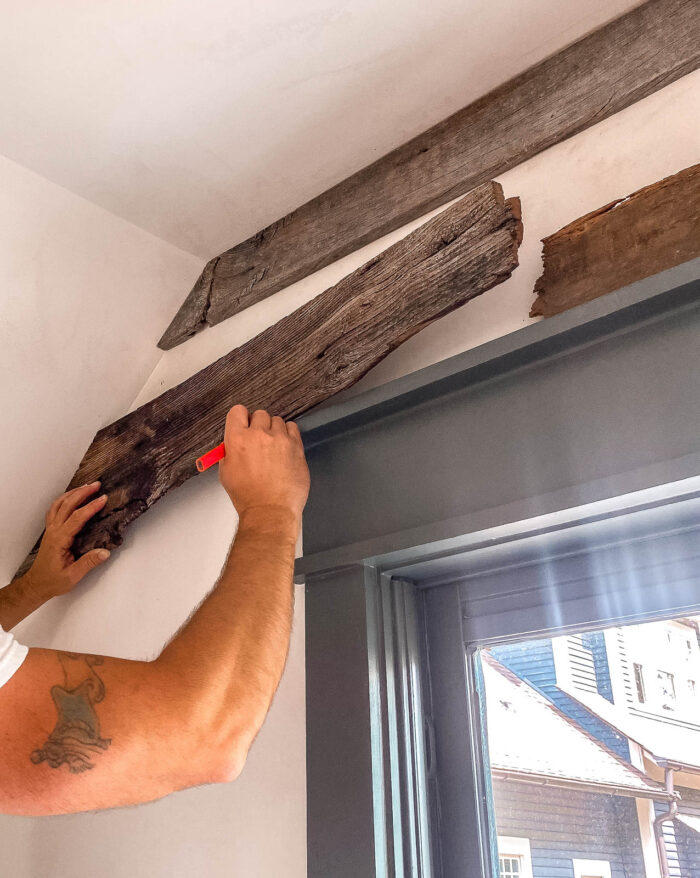
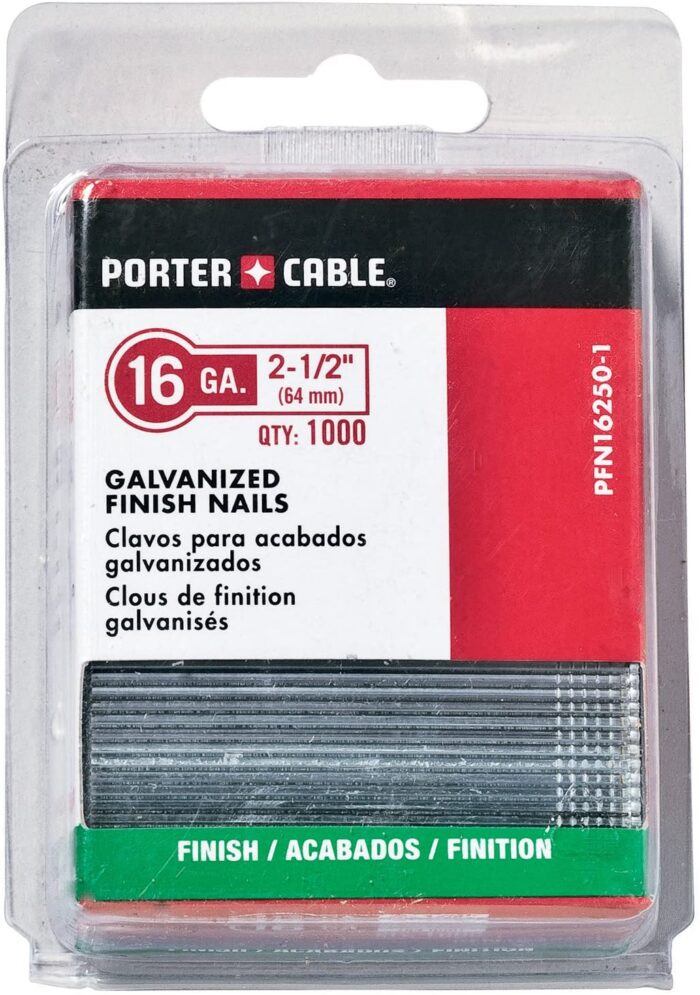
Nail it in! John used 16 Gauge, 2 1/2″ Porter Cable finishing nails with a nail gun to install each piece. He put 2-3 nails per stud that each piece intersected with.
16 Gauge, 2 1/2″ Porter Cable Finishing Nails…
Nail Gun…

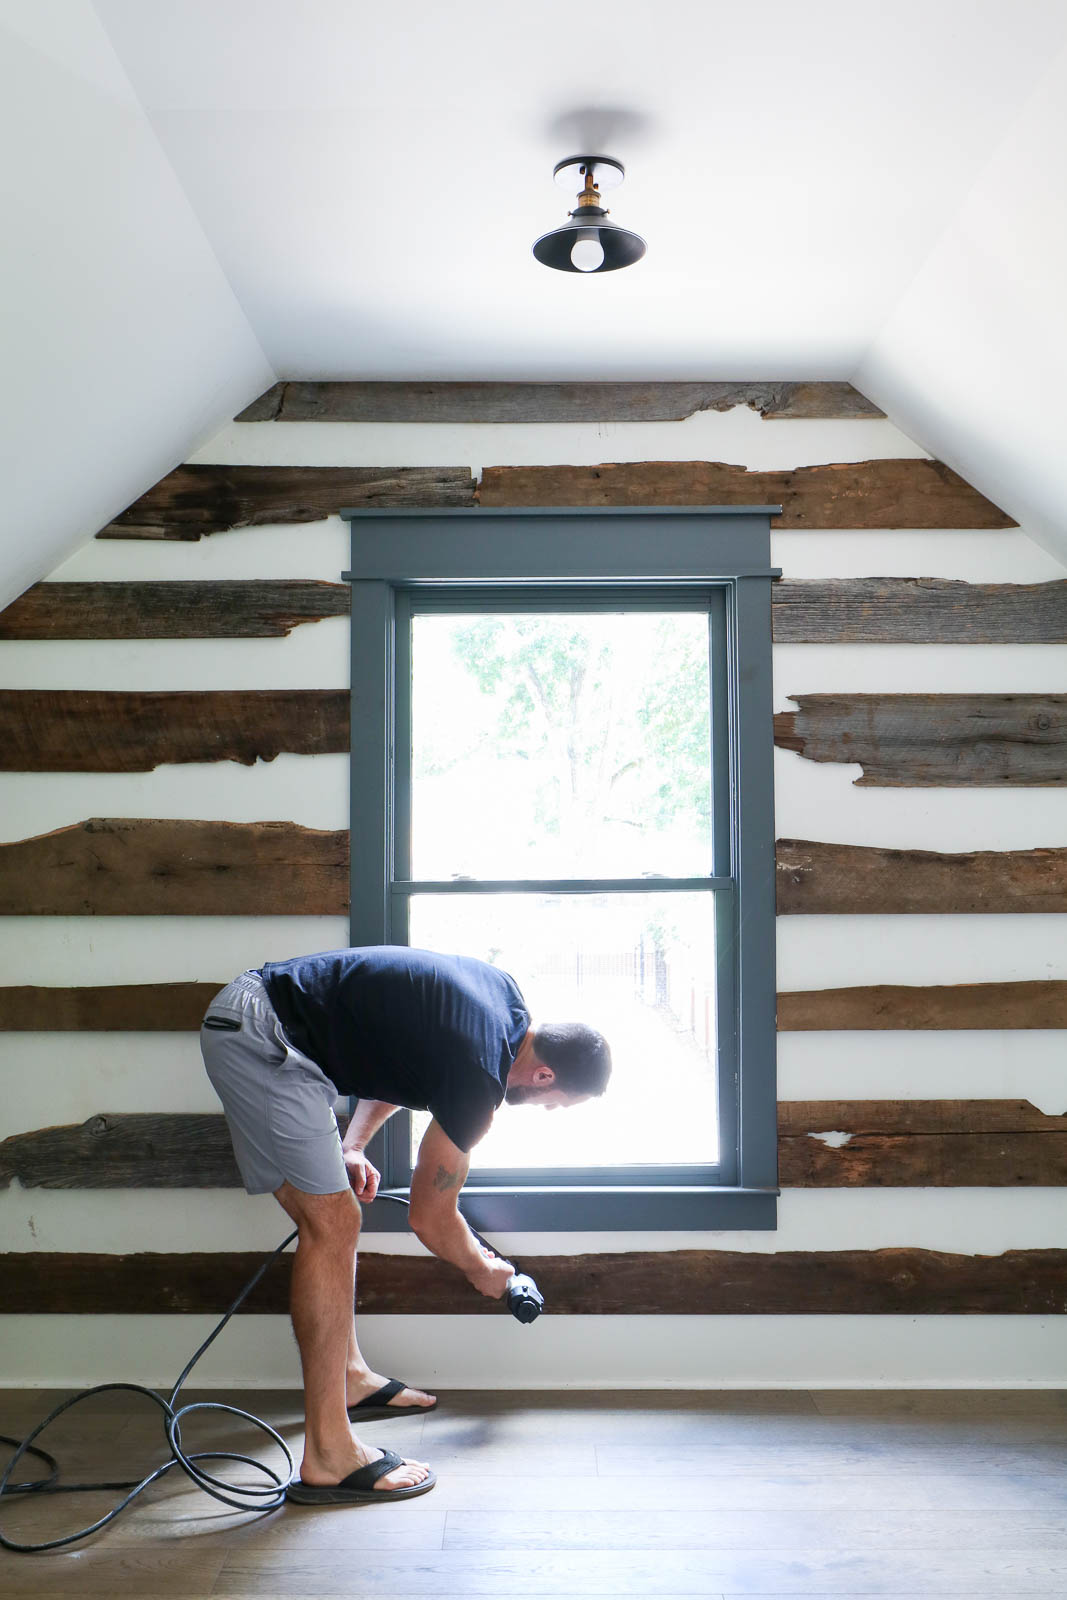
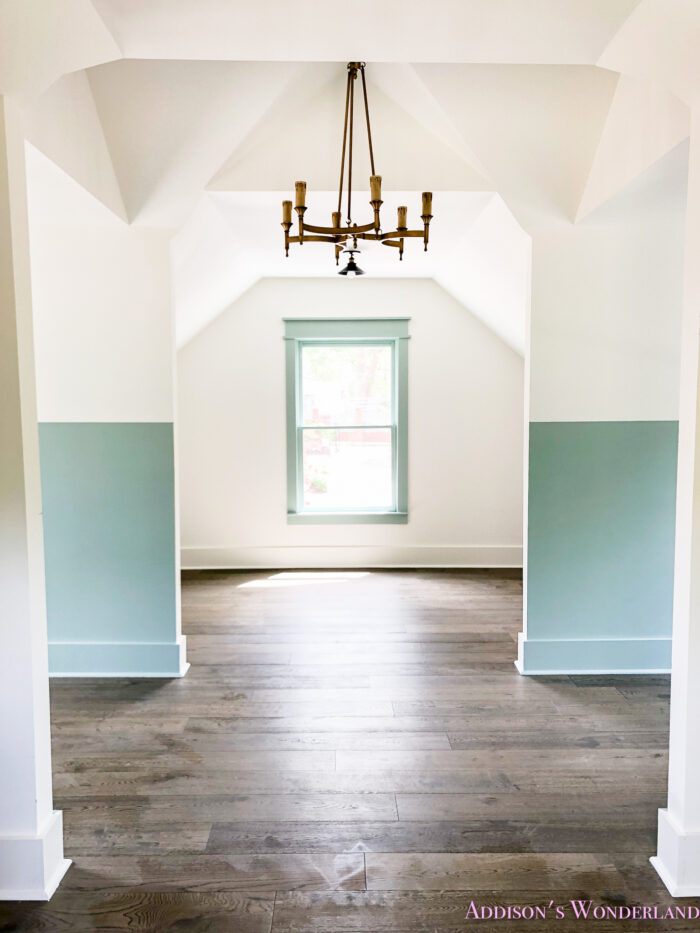
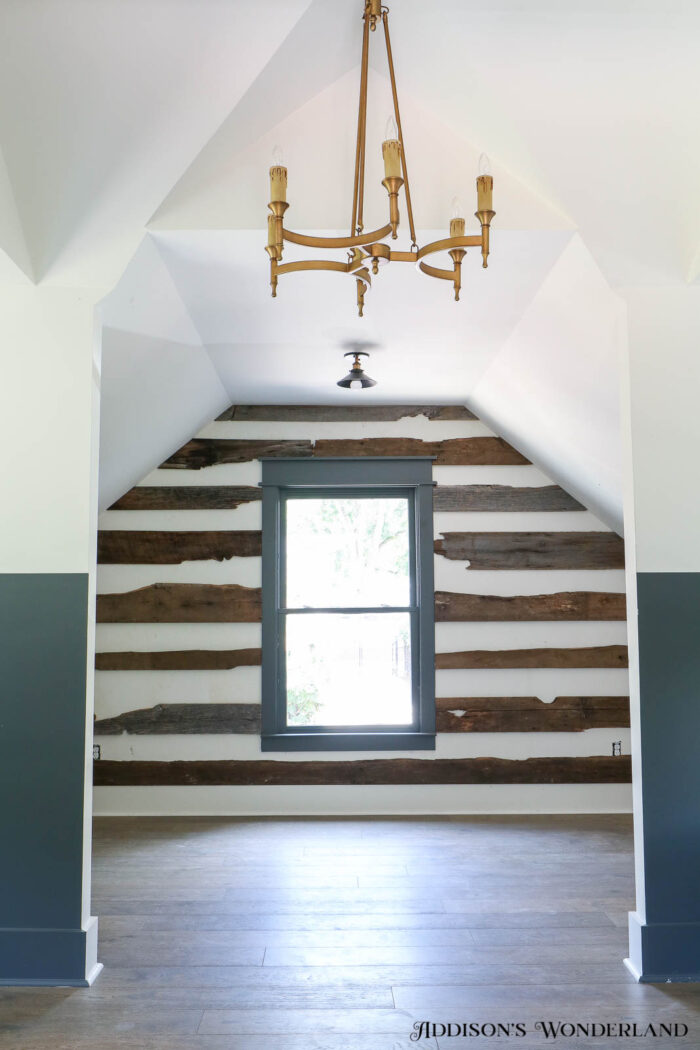
The Finished Project…
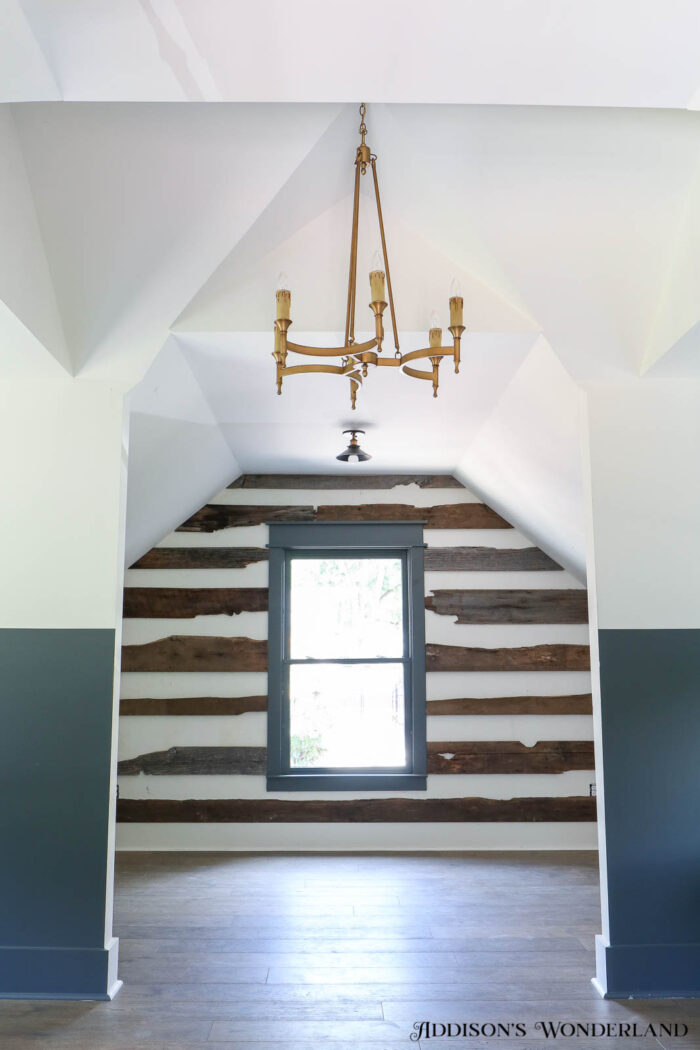


Room Details…
Wall Color- Alabaster by Sherwin Williams
Trim Color- DownPipe by Farrow & Ball
Wood Planks- Rustic Roots
Chandelier- Ballard Designs (discontinued)
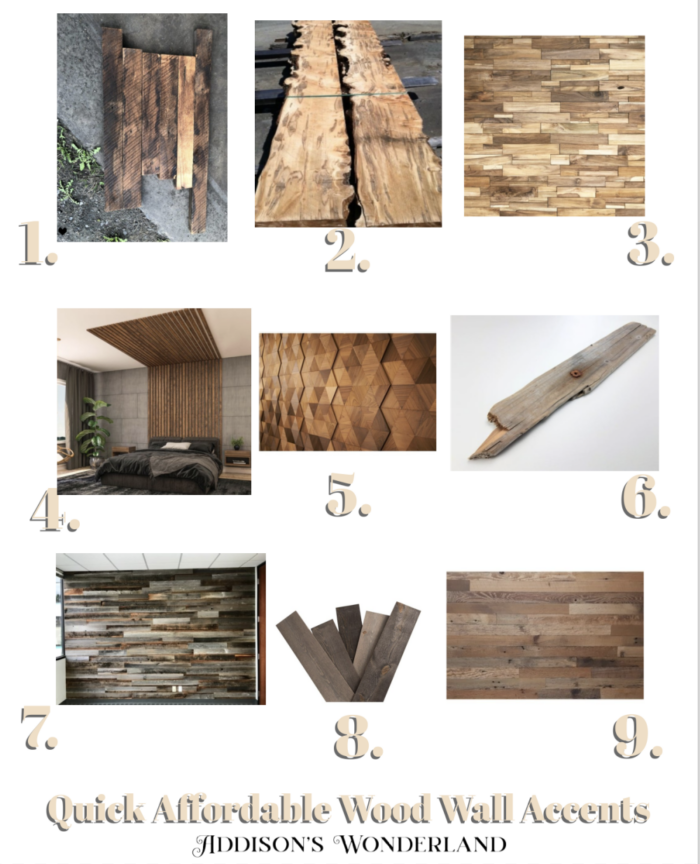
4. Wood Slats
XOXO, Brittany Palazzo
+ view the comments


")
")