Excited about this one! Today I am sharing one of the more fun projects we’ve tackled over the last few months! I feel like with Ab and I, our work life ebbs and flows between a whole lot of computer time and a whole lot of getting our hands dirty construction/DIY time and lately it’s been way way too much screen time. I think we are both craving some days or weeks with our hands in grout and our minds on wallpaper placement. So before we get to all of that fun starting next week with our historic flip home, we decided to take a break from our laptops and jazz up a few rattan pendants!!!
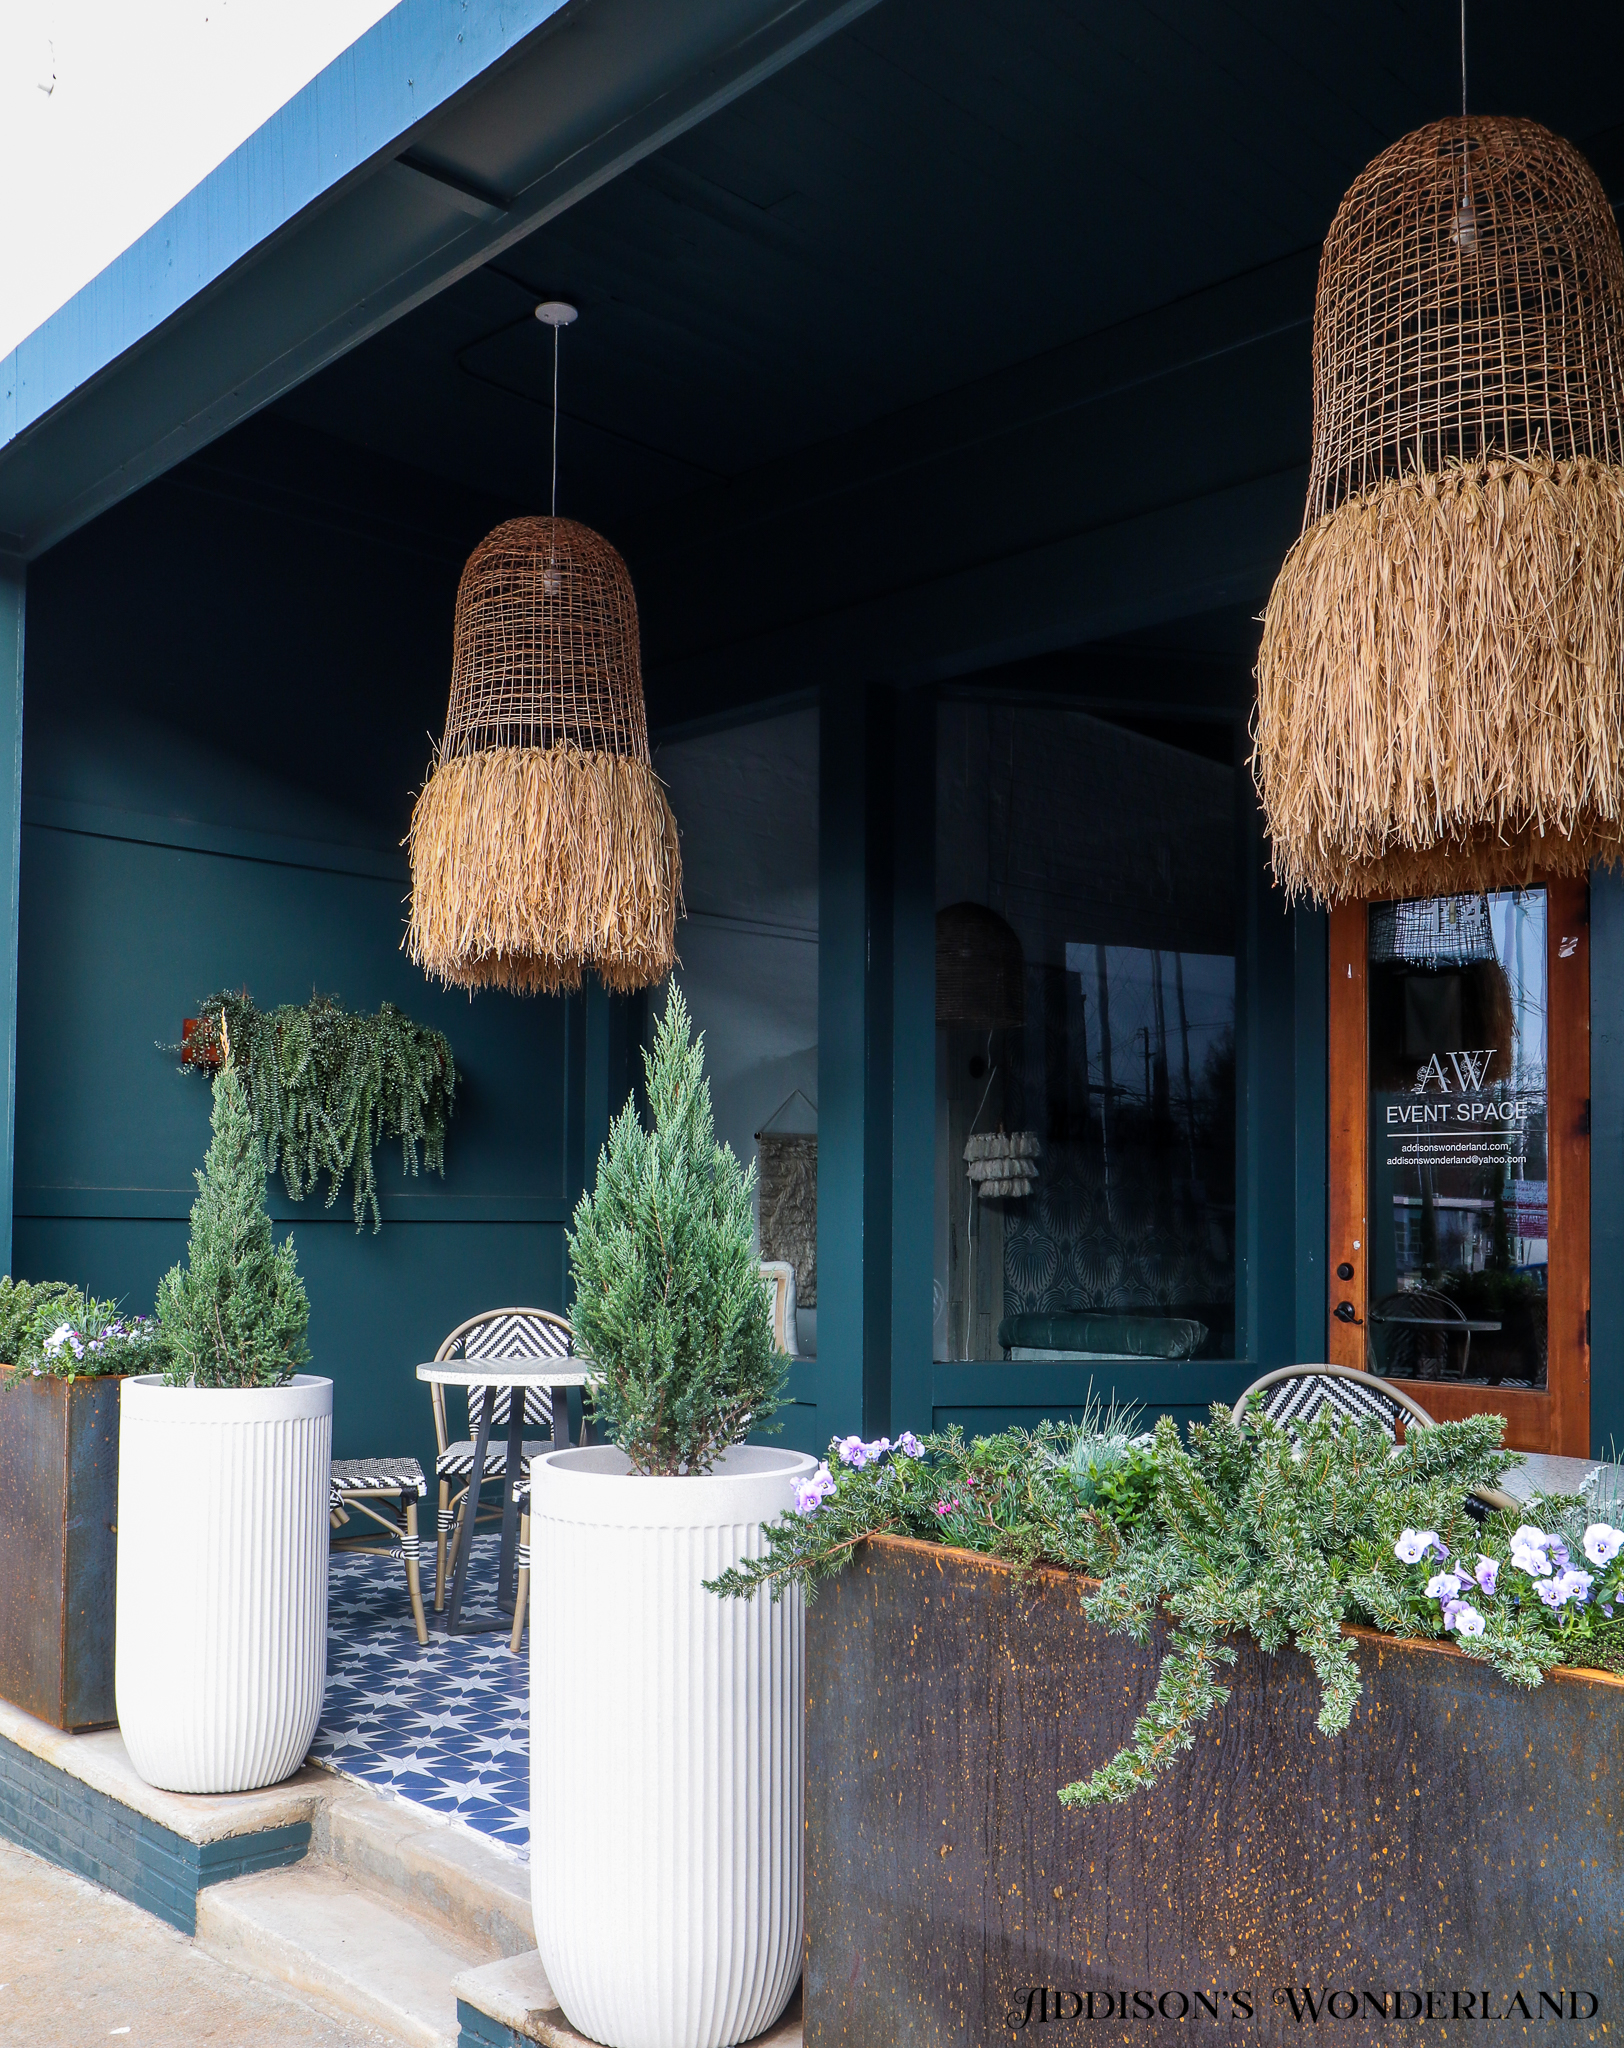
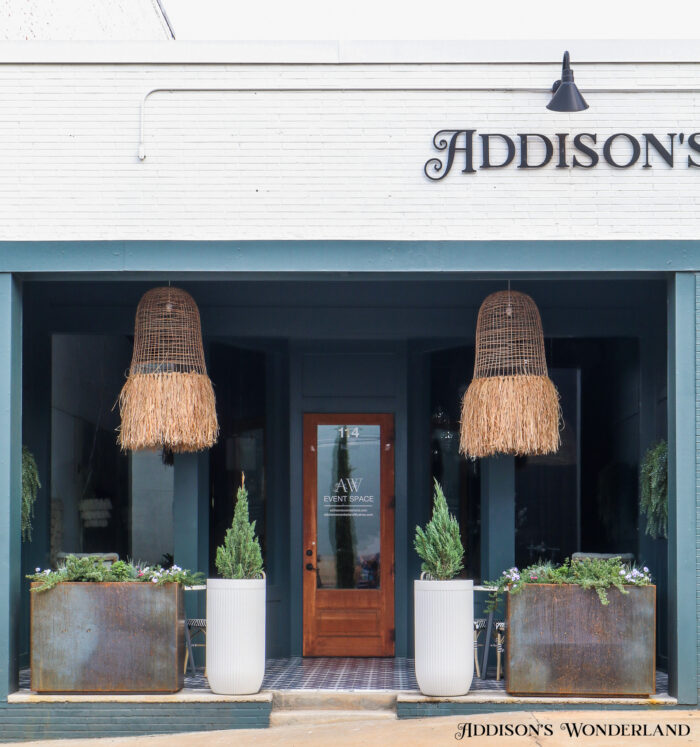
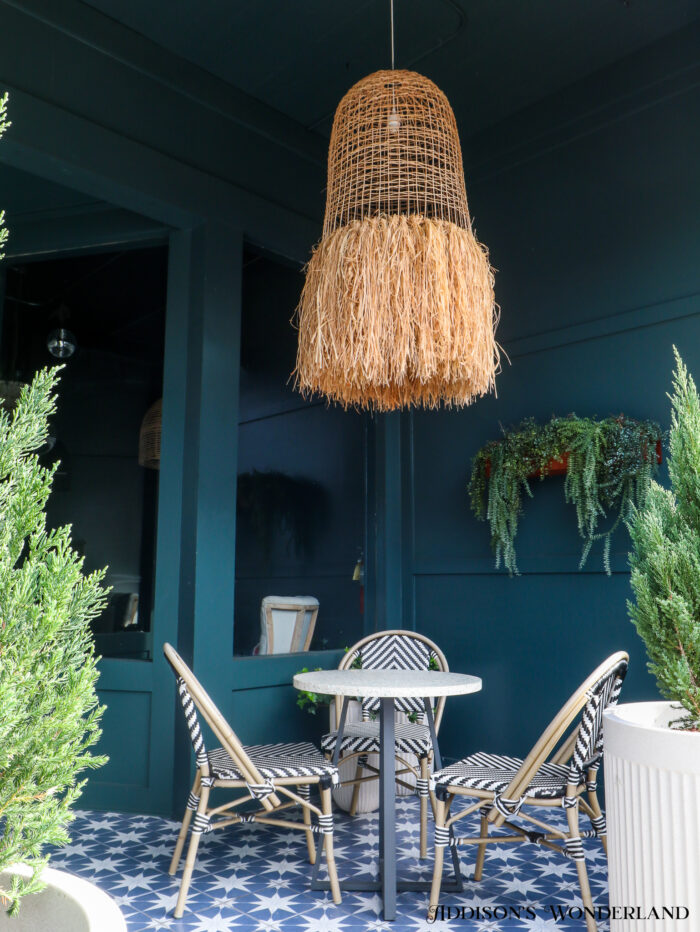
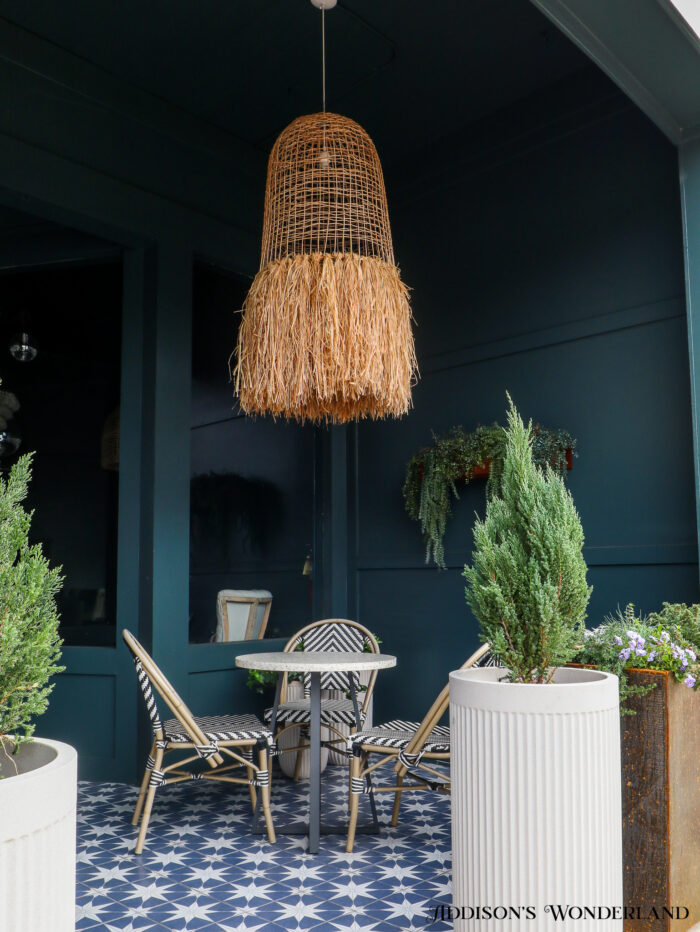
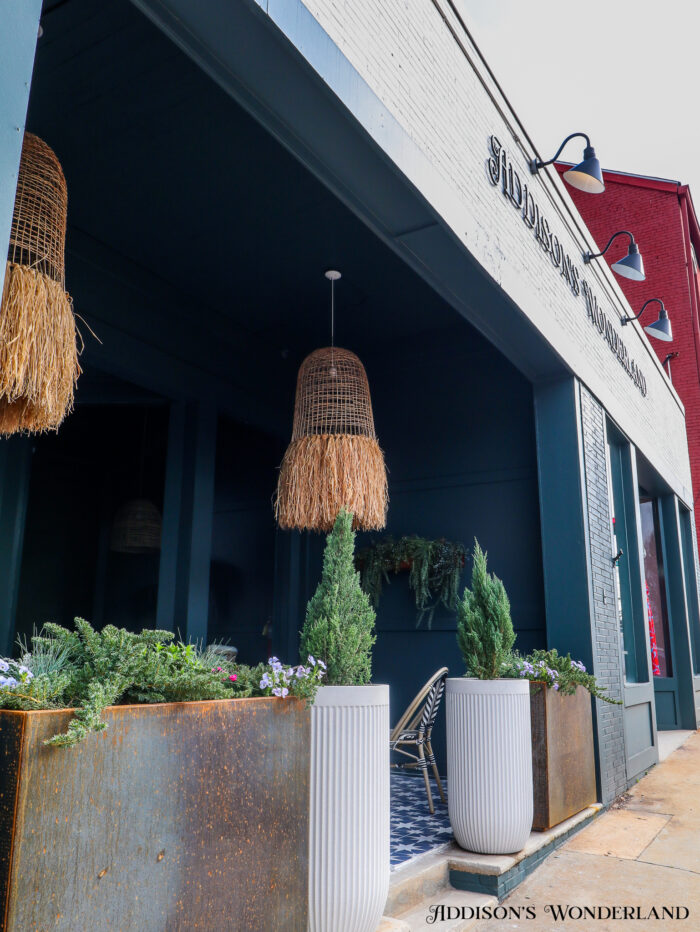
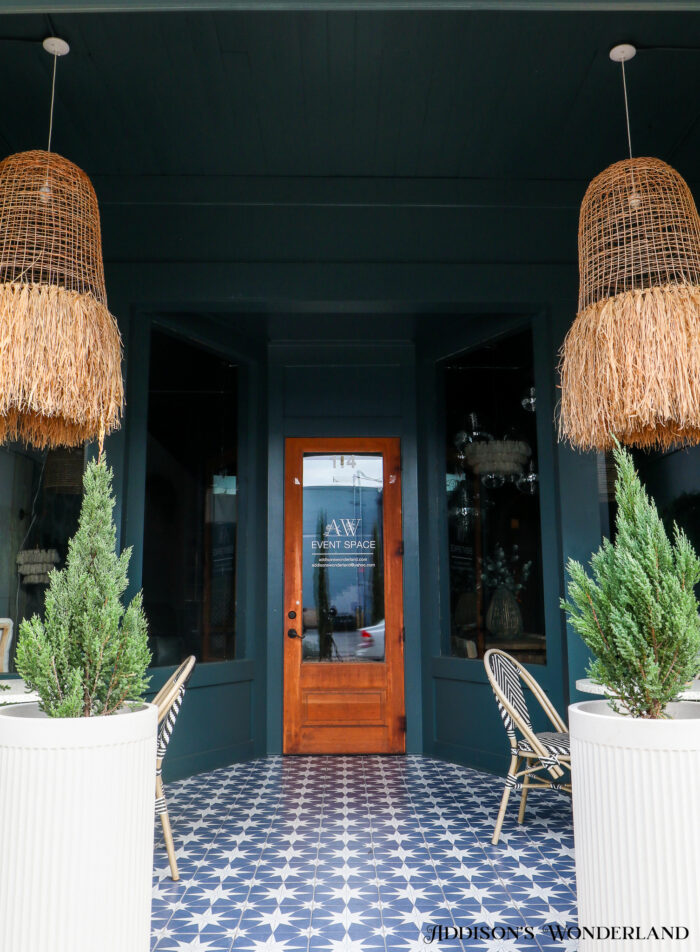
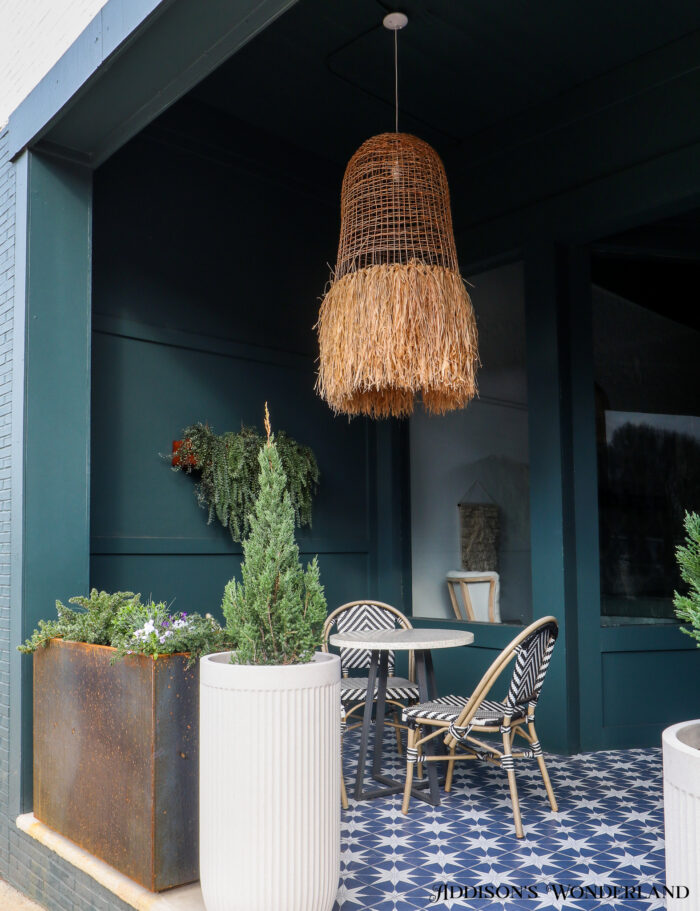
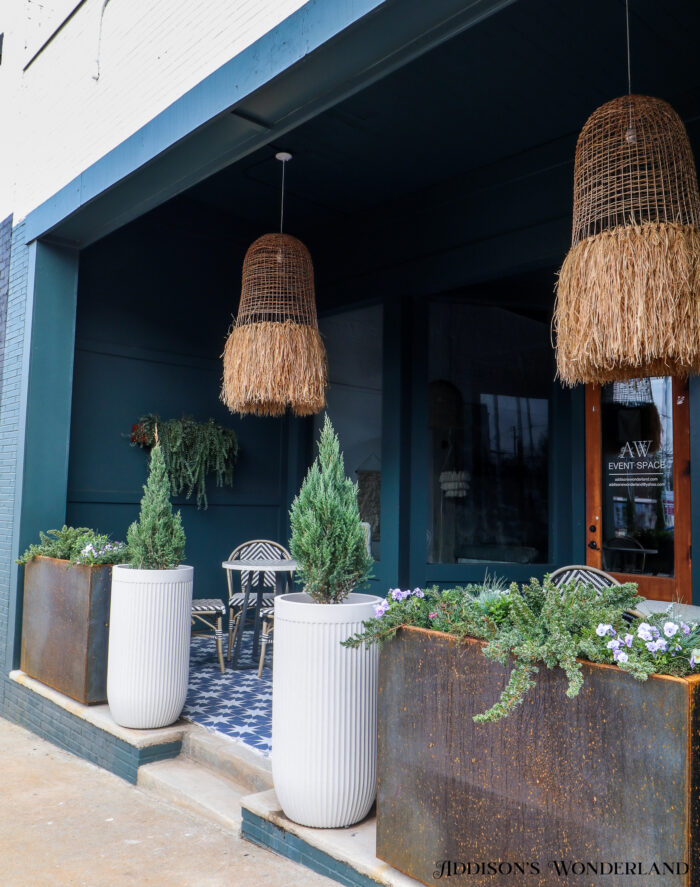
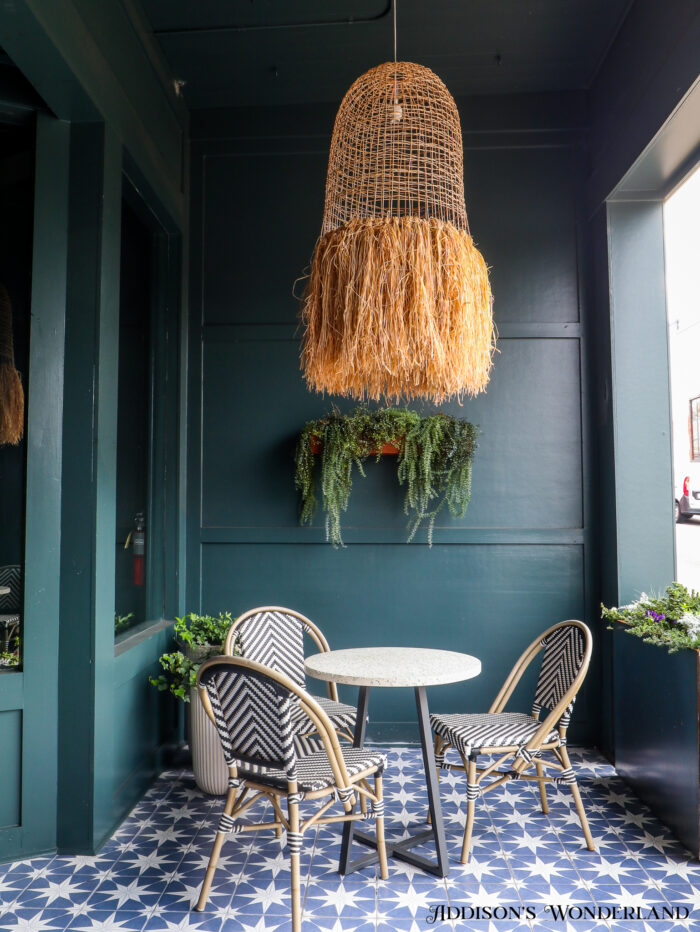
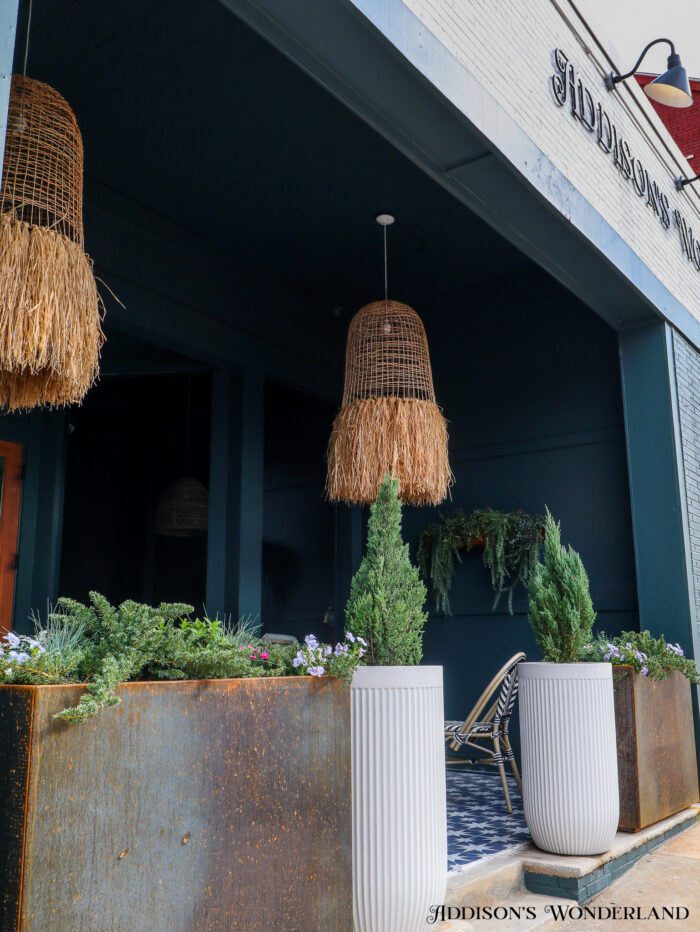
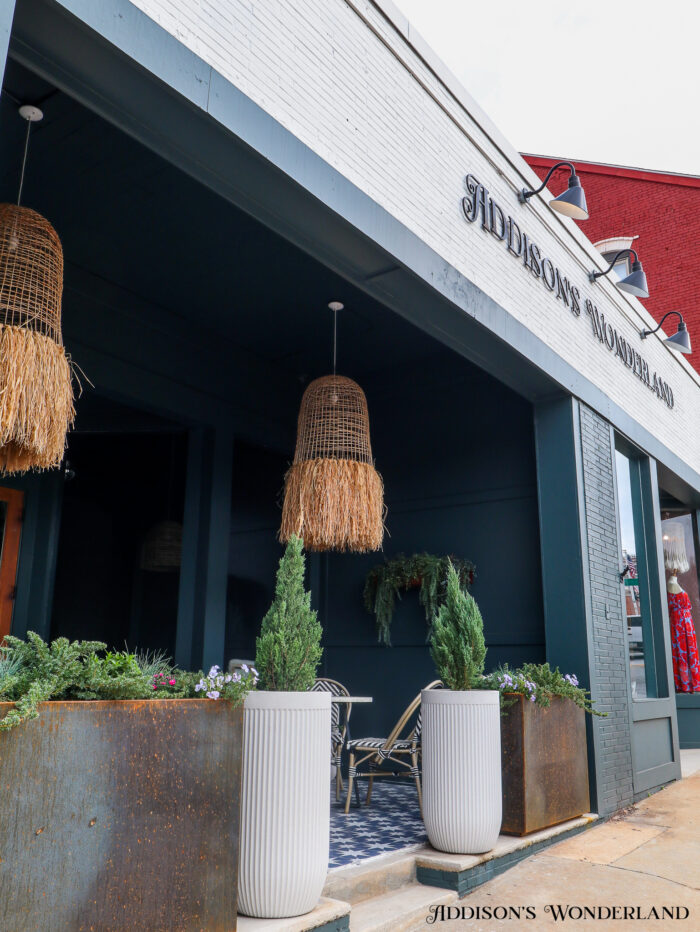
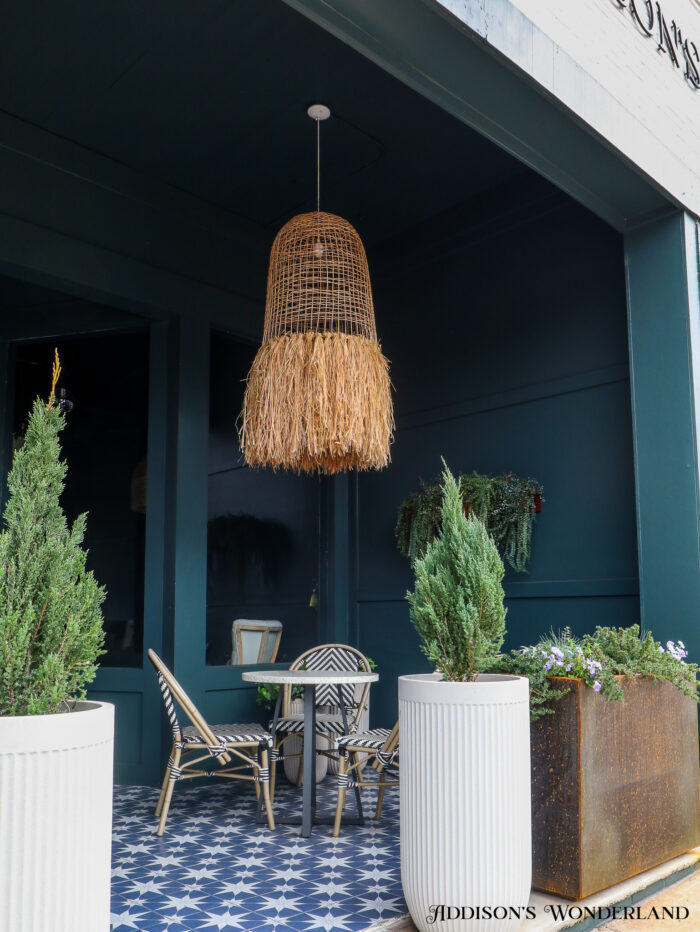
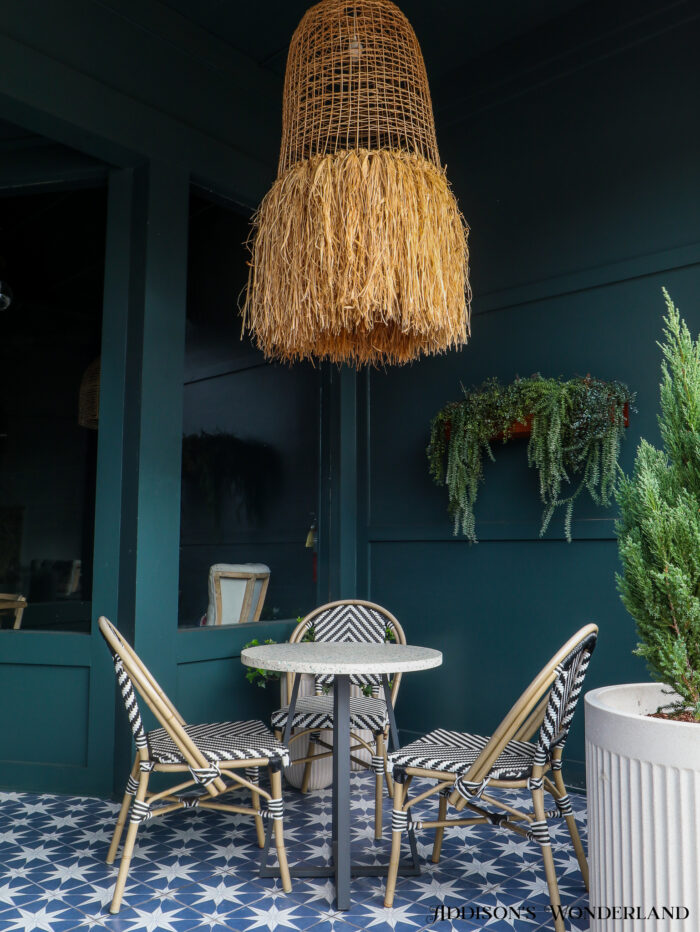
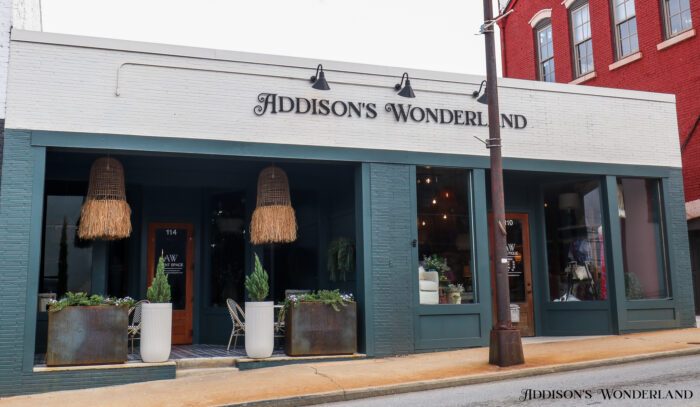
First things first… I LOVE FRINGE. John joked a few months back that our tassels even have tassels! LOL. So when it came time to tackling some updates at our Addison’s Wonderland Event Space, I first wanted to make the front patio extra cozy, whimsical and fun. We freshened up the exterior with a new paint color… Dark Pewter by Benjamin Moore… and this gorgeous tile I found online. From there I really wanted new fixtures but after seeing a couple of pricey fringe pendants I wanted to order, Ab and I thought… why not just MAKE THEM!
AW Event Space Rental Information
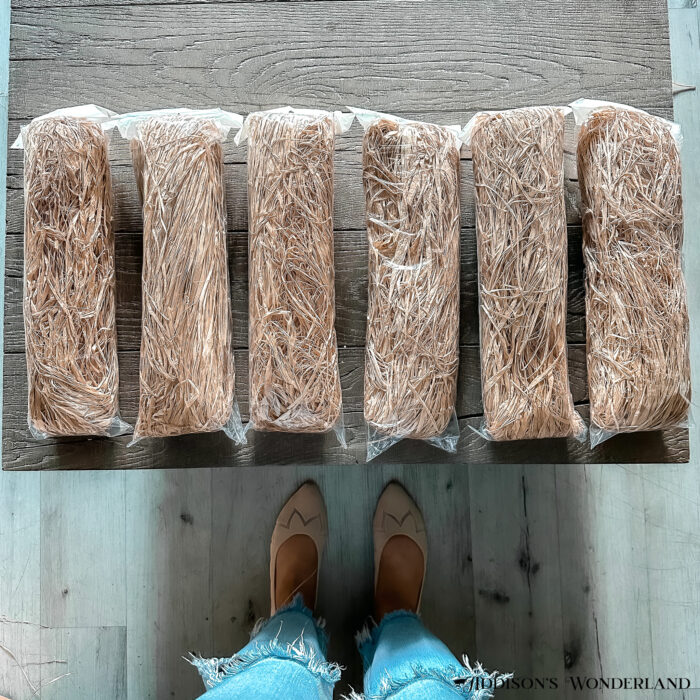
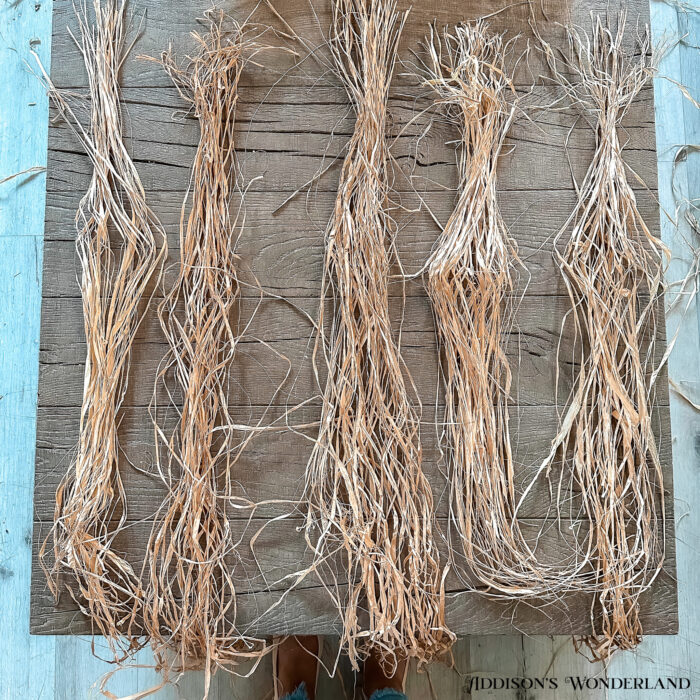
We’d had two large rattan pendants hanging in the front windows inside the event space and thought they’d be perfect candidates for a little (or a whole lot) fringe-ifying! Ab ordered six packets of rafia online which actually ended up being the perfect amount and we got to work! Here’s a peek at the process…
The Fixture
Sadly these exact ones have been discontinued…

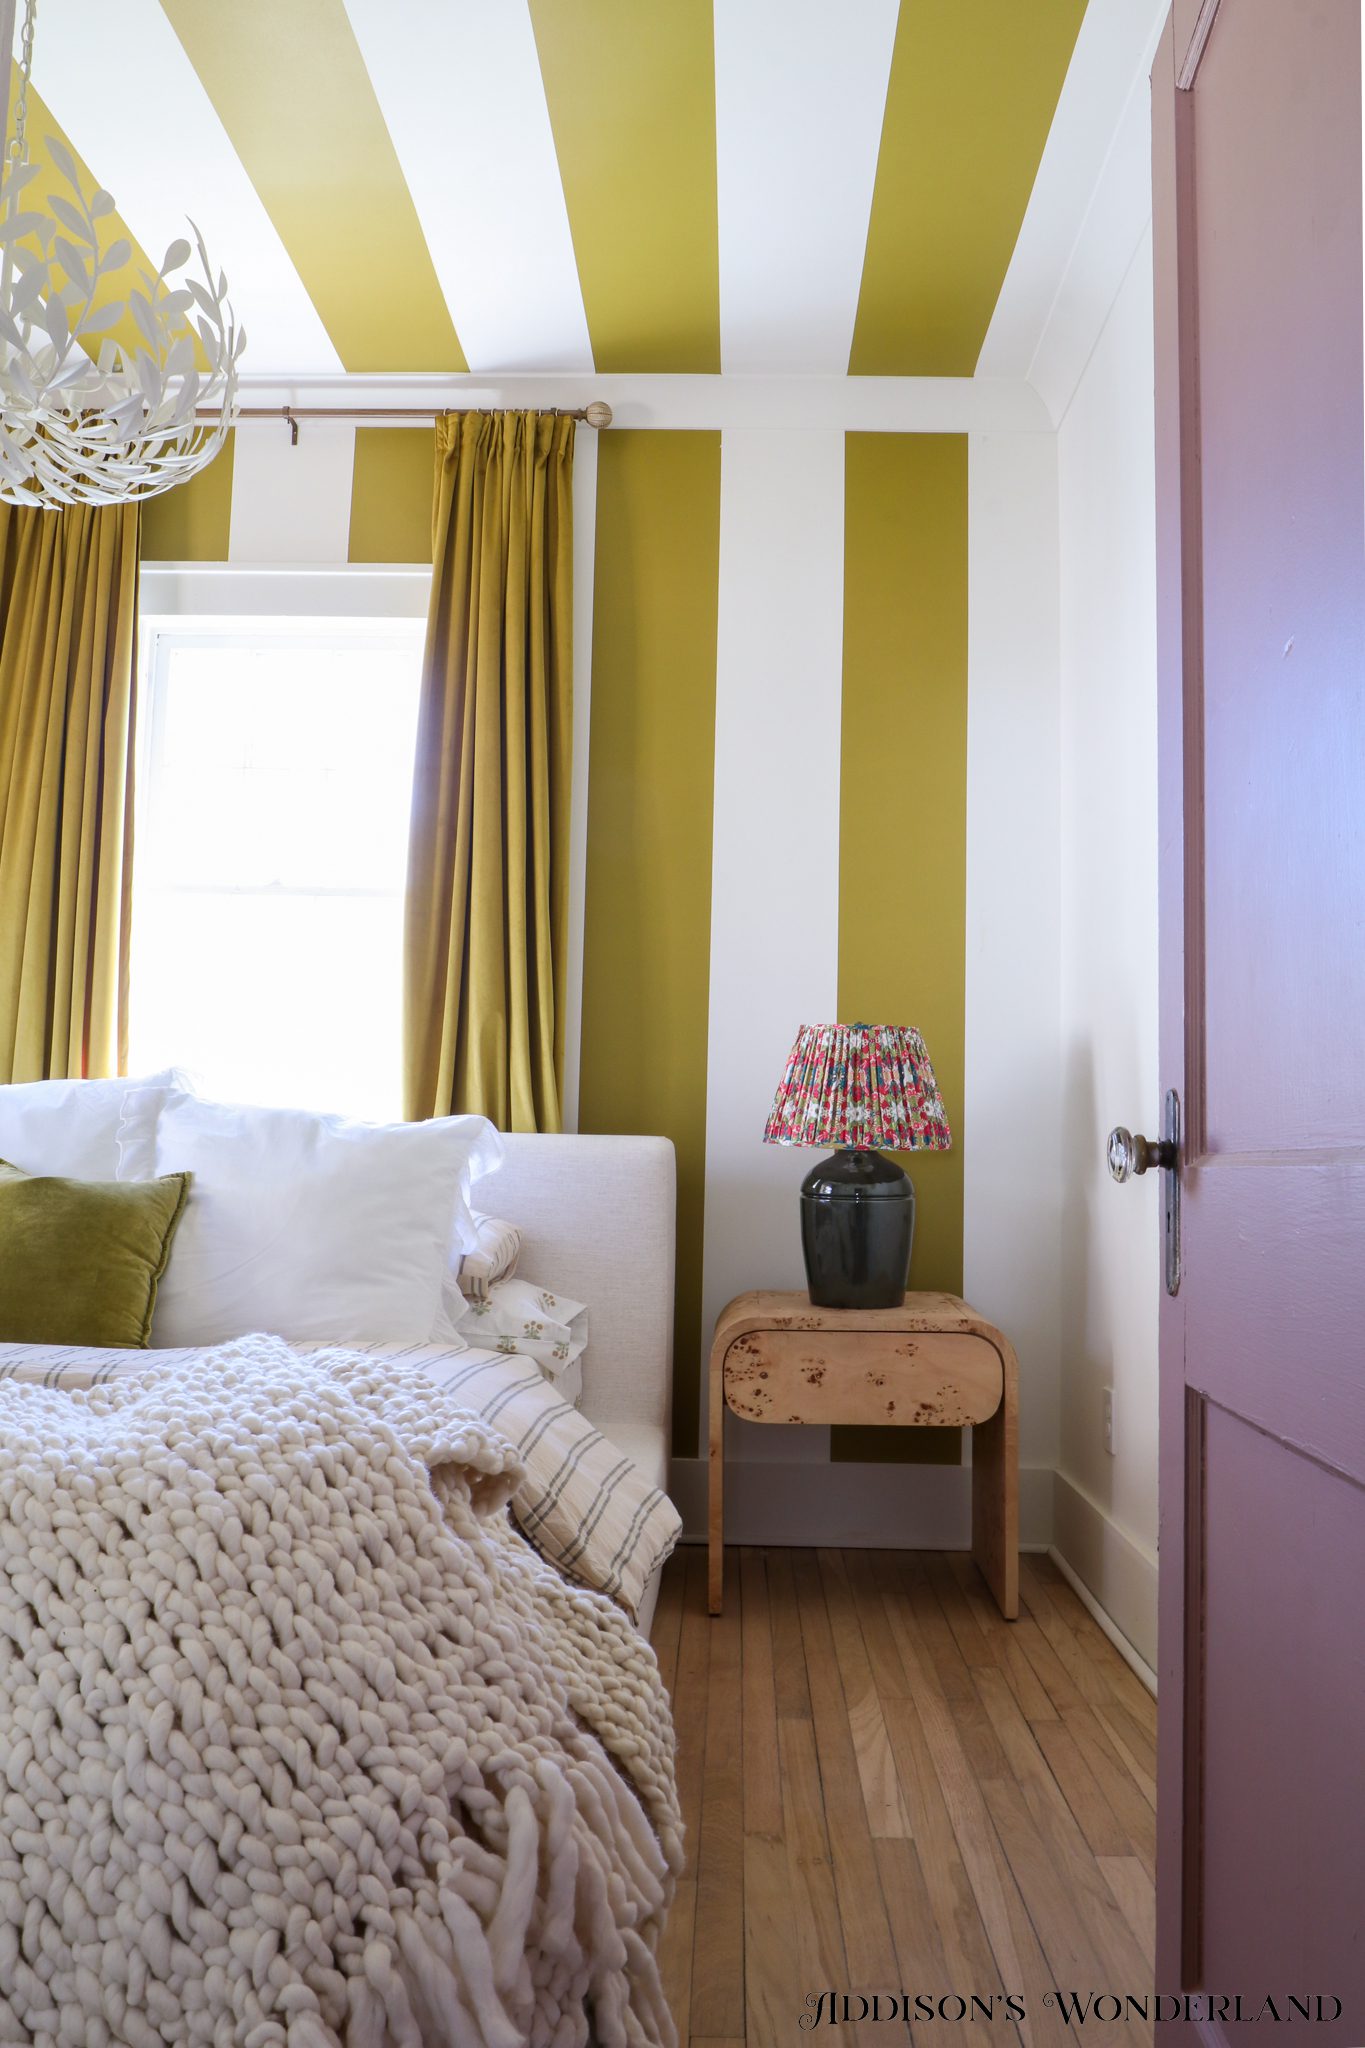
Rattan Pendant Options…

The Supplies
THIS EXACT RAFIA
THIS OUTDOOR SPRAY
Literally just rafia! We actually searched high and low for the perfect rafia and this is the one we chose. And fingers to tie lots and lots of knots. Unless you want them outdoors and I share that spray coat below…
Step One
Separate into sections of rafia about this size…
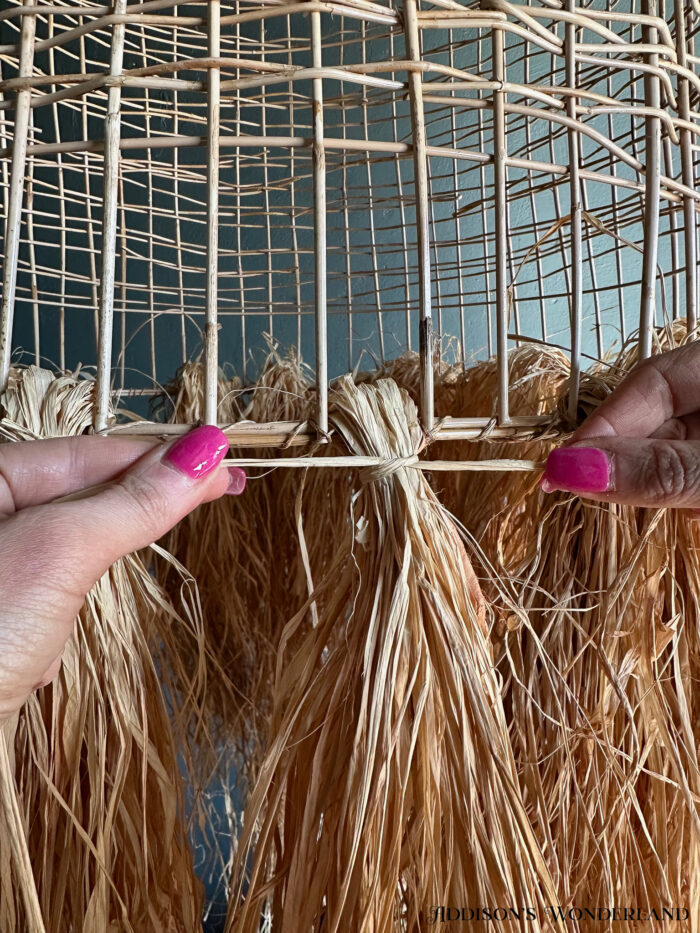
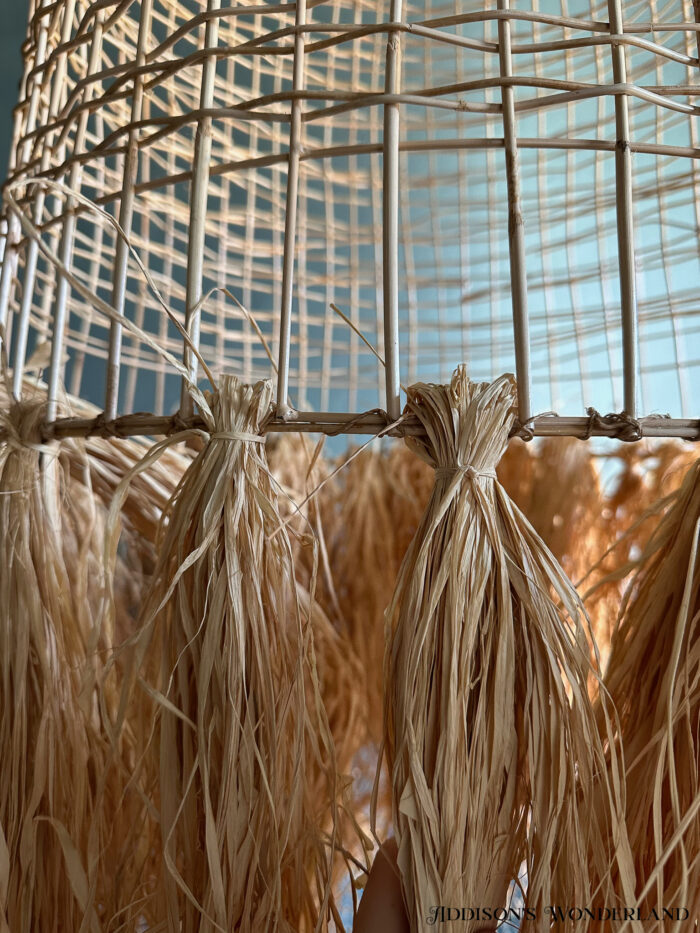
Loop each newly separated section through a section of the rattan pendant with equal rafia on each side…

Step Two
Taking a piece of rafia, secure the rafia by tying it into a knot…
Step Three
If you plan to use outdoors, we suggest spraying down the entire fixture including the rafia with this spray. Also, make sure and use LED bulbs with the fixture to avoid the rafia overheating.

VOILA!

Rectangular Planters / Tall White Planters
AW Event Space Rental Information
Shop Addison’s Wonderland


XOXO, Brittany Palazzo
+ view the comments


")
")