Gooood morning! Happy Tuesday! Our small town had the annual Fall Festival this past Saturday and it was SO much fun. There was something so refreshing about seeing everyone out and about enjoying the day! One thing Monroe, GA is known for is the ridiculous amount of antique shopping that is available. We have more old stuff than we know what to do with, and people come from all over to walk the isles of our antique malls.
Typing that out made me realize JUST how southern that sounded.
Anyways, I found so much weird/unique stuff while I was walking around and my long todo list of stuff for the house quickly went by the waste side. I spent about six hours after the festival refurbishing all of the things.
My favorite find from the day are the chairs that I am chatting about today. They are magic. I saw them from across the room and almost attacked the poor lady setting up her booth (: The only problem is that they are upholstered in a brutal canary yellow. I am sure that they went perfectly in their old home but they did not fit the vibe I am going for in the dining room. I was planing on reupholstering them but I decided to try out painting them first and they turned out AMAZING. Here is what worked for me…
Materials:
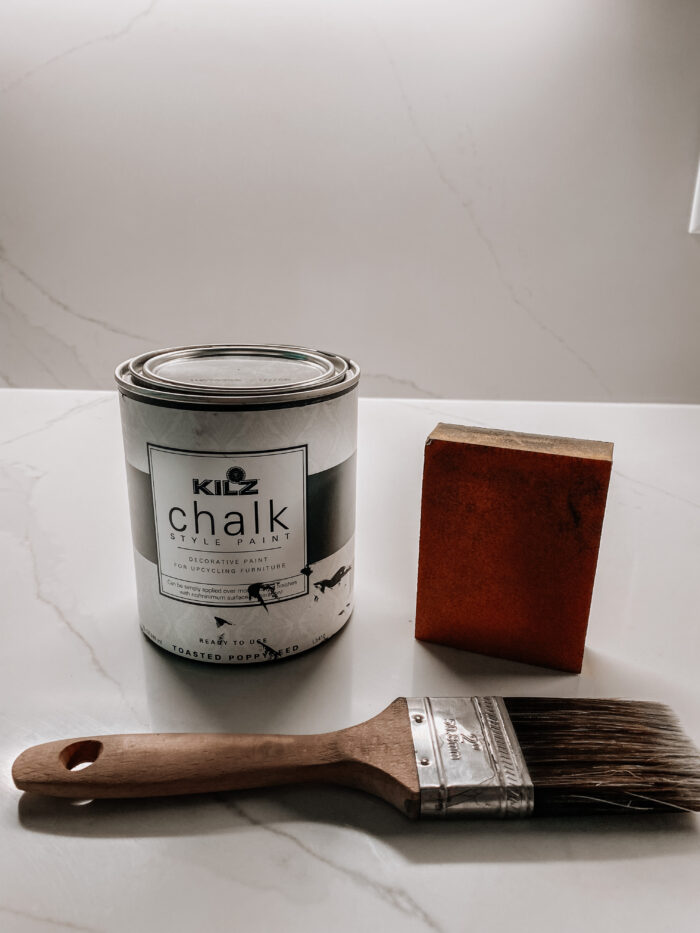
Kilz Chalk Paint
Sanding Block
Paint Brush
Paint Tray
Drop Cloth
Water
Step One: Sand the Fabric
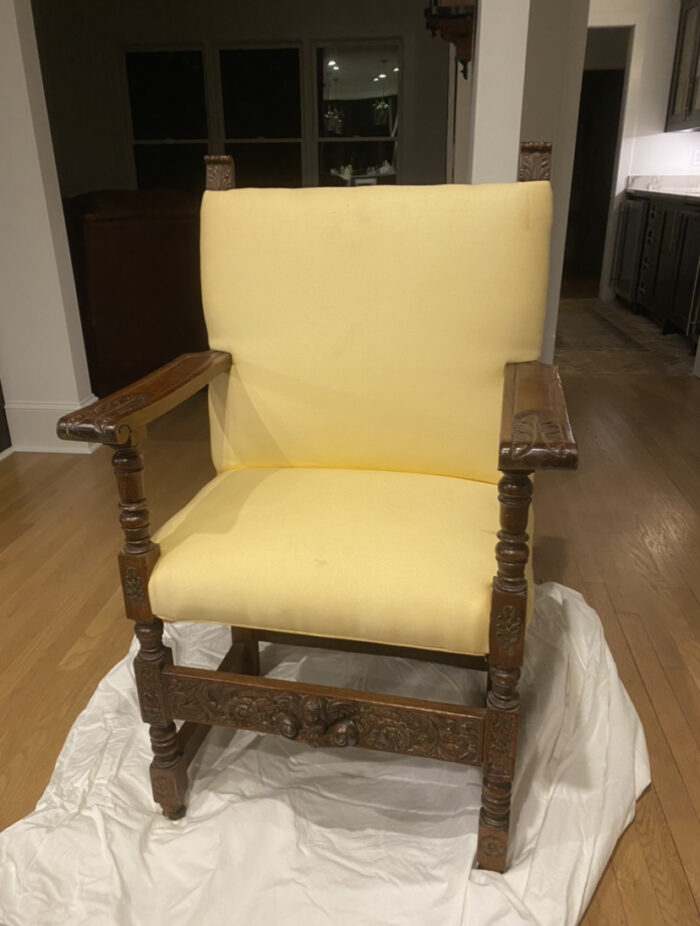
Gently sand down the fabric to remove any dirt or grime that might have built up over time. This will also help to make the fabric more cohesive once it is painted. Please note that I am working with a smooth fabric, if you have a textured fabric sanding is not recommended.
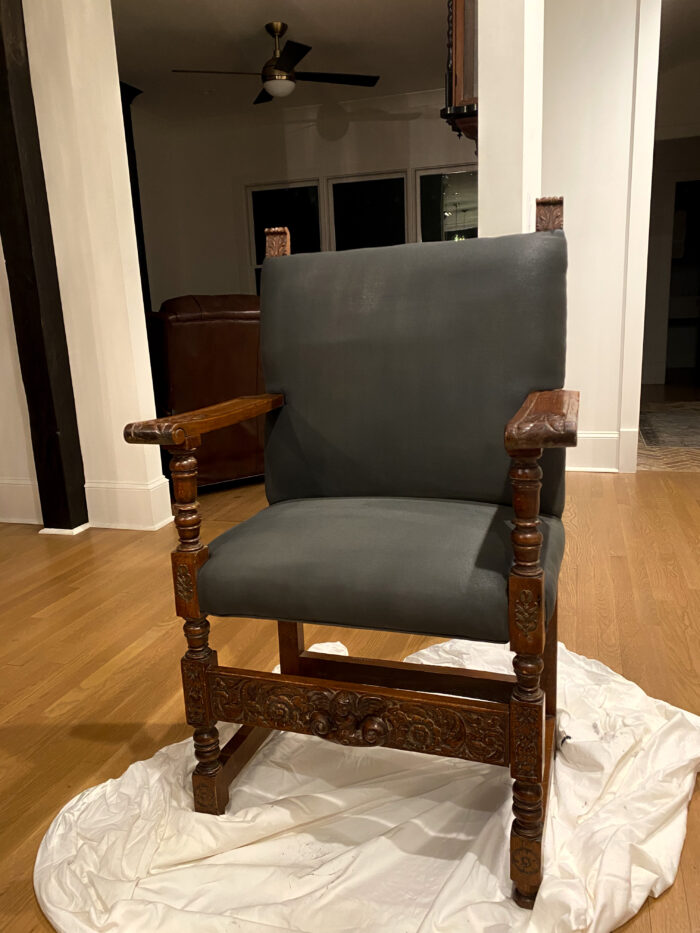
Step Two: Wet the Fabric
Using the paint brush, wet a section of the fabric. The top layer needs to be saturated but make sure that you are not soaking the cushion underneath. Moving in sections will ensure that the fabric is staying wet while you are working the paint into the fiber. The goal is to keep the paint from sitting on top on the fabric. If it gets thick and doesn’t soak into the material, it will dry flakey and will feel rough.
Step Three: Paint the Fabric
I used Kilz Chalk Paint but there are a bunch of different paint options for this process. I wanted a flat matte finish so I took a little bit of a risk with material choice.
Using the same brush, you will paint the section of the fabric that you have saturated with water. Since the brush is already wet, it will thin the paint down which is is what you want! Think of it more as a “staining” process more so than painting. I added a little bit of water to the mixture to thin it even further. Do not worry so much with getting an even coat on the first round, everything will even out with the second coat.

Kilz Chalk Paint

After the first coat…
Step Four: Sand the Fabric
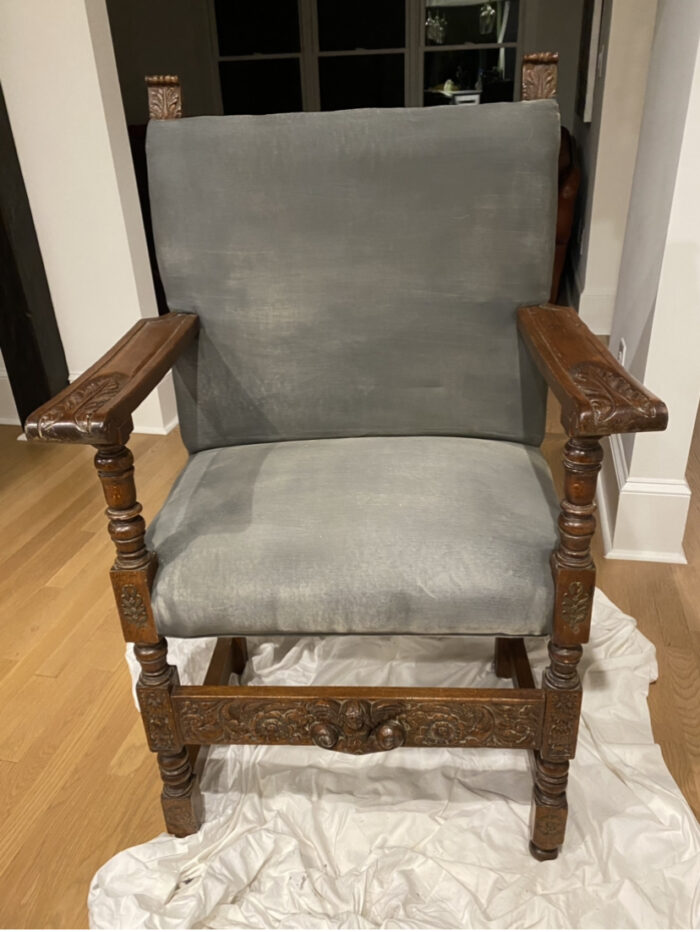
I wanted to maintain the integrity of the fabric while achieving a dark color so I decided to sand in between coats. This will ensure that there is not any paint build up on the surface of the fabric and that everything is actually seeping into the material.
Step Five: Paint One More Coat
Follow the same steps for this coat that were required for the first one. I also watered down the paint a little bit more for the second coat.
Step Six: Oil the Fabric
Okay, this is so weird but it worked for me… face palm… I used olive oil in the final step of this process. There are lots of different sealing products for painting upholstered furniture but I didn’t want to change the look of the fabric. If that freaks you out, I would recommend looking into the wax sealers that are typically used for this process.
Dry brush oil onto the fabric. Make sure that you are not using an excessive amount of oil and that you are using the paint brush to work it into the fiber. This will help to keep the fabric soft once the paint from the second coat completely dries.

Anddddd Voila…
(Final paint for the house is this upcoming weekend, ignore the patchy walls 🤦🏼♀️)
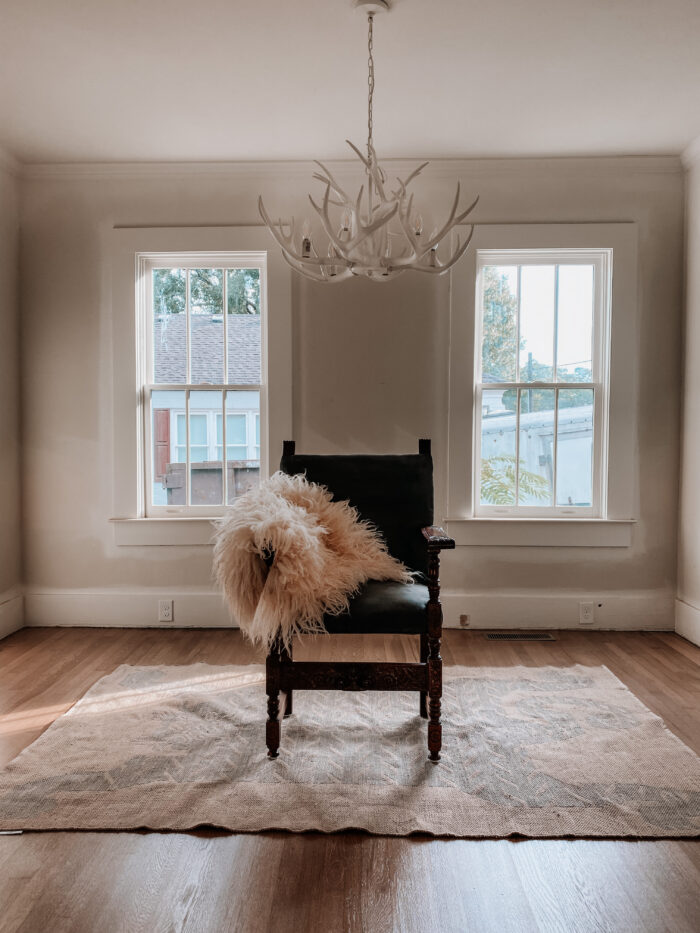
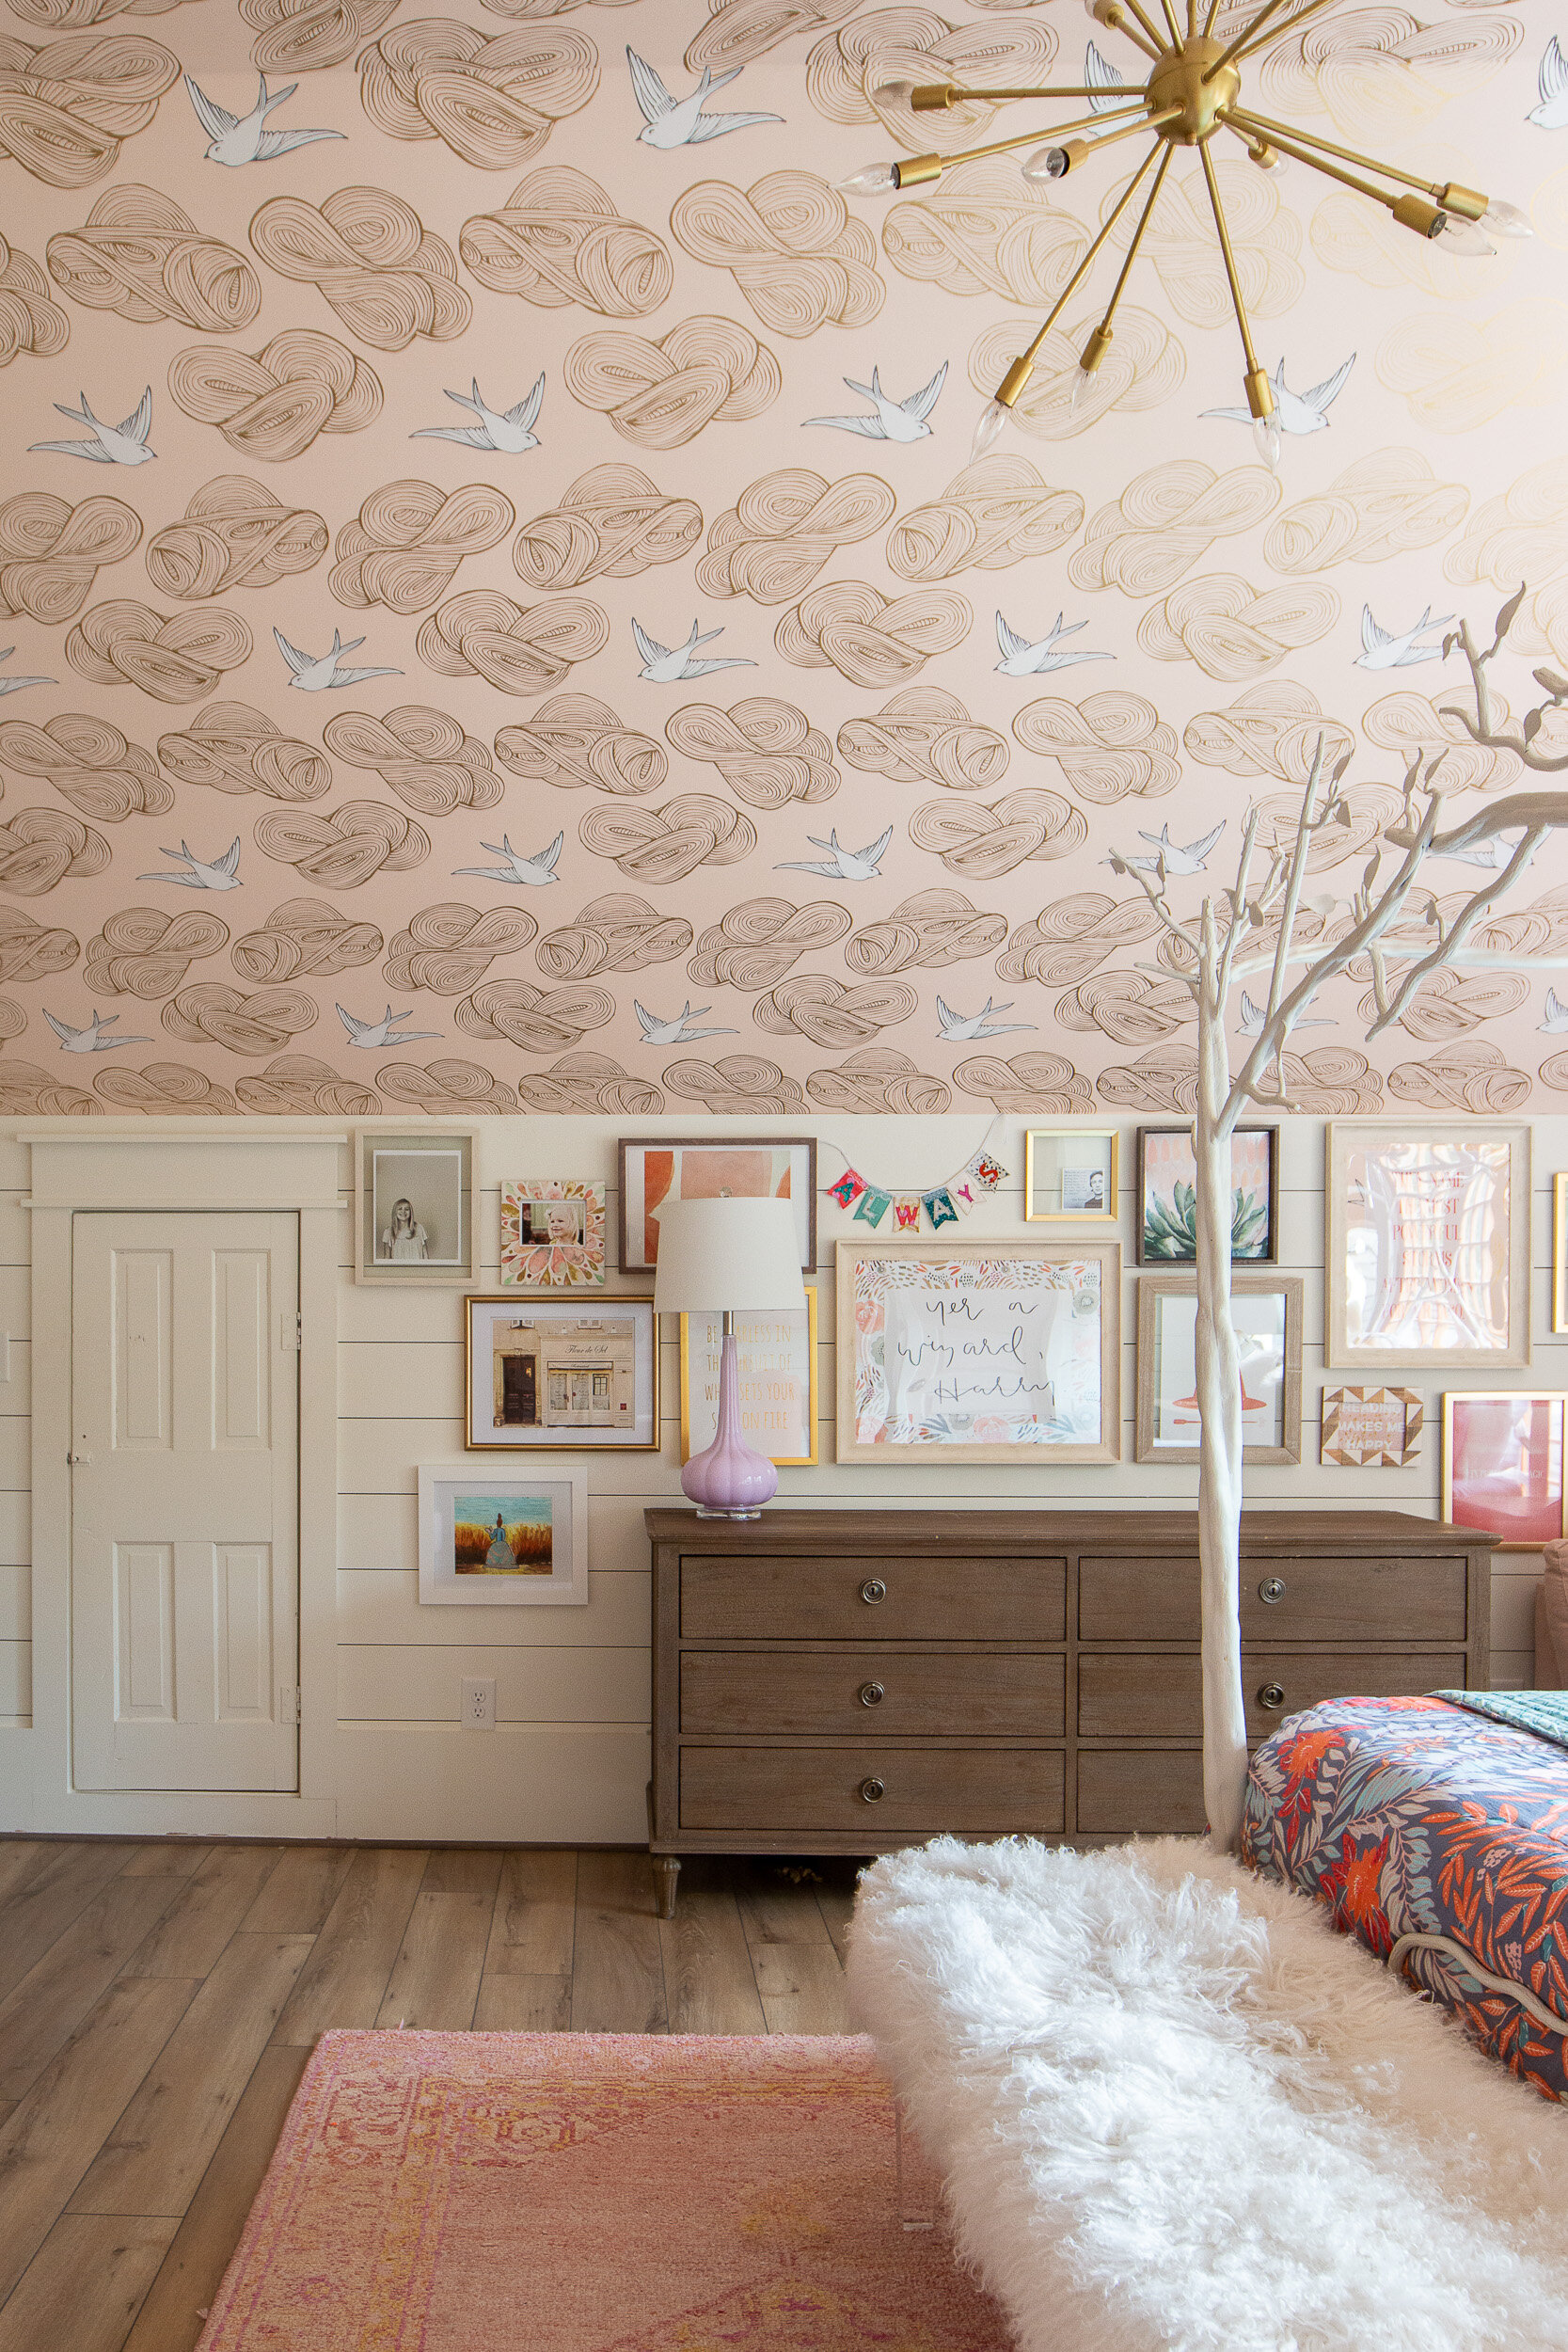
Light Fixture / Rug
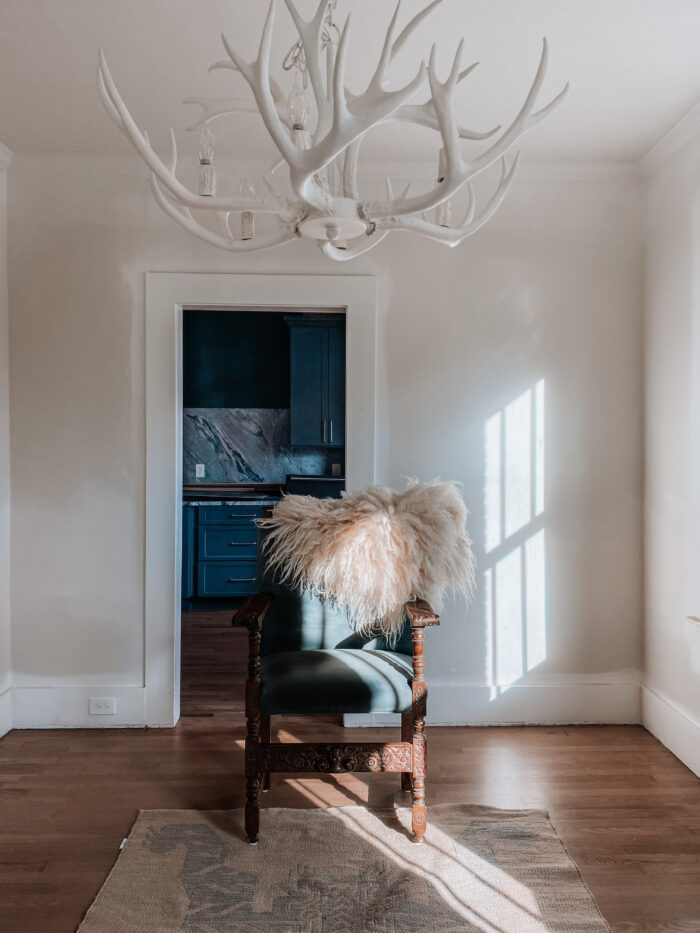
Light Fixture / Rug
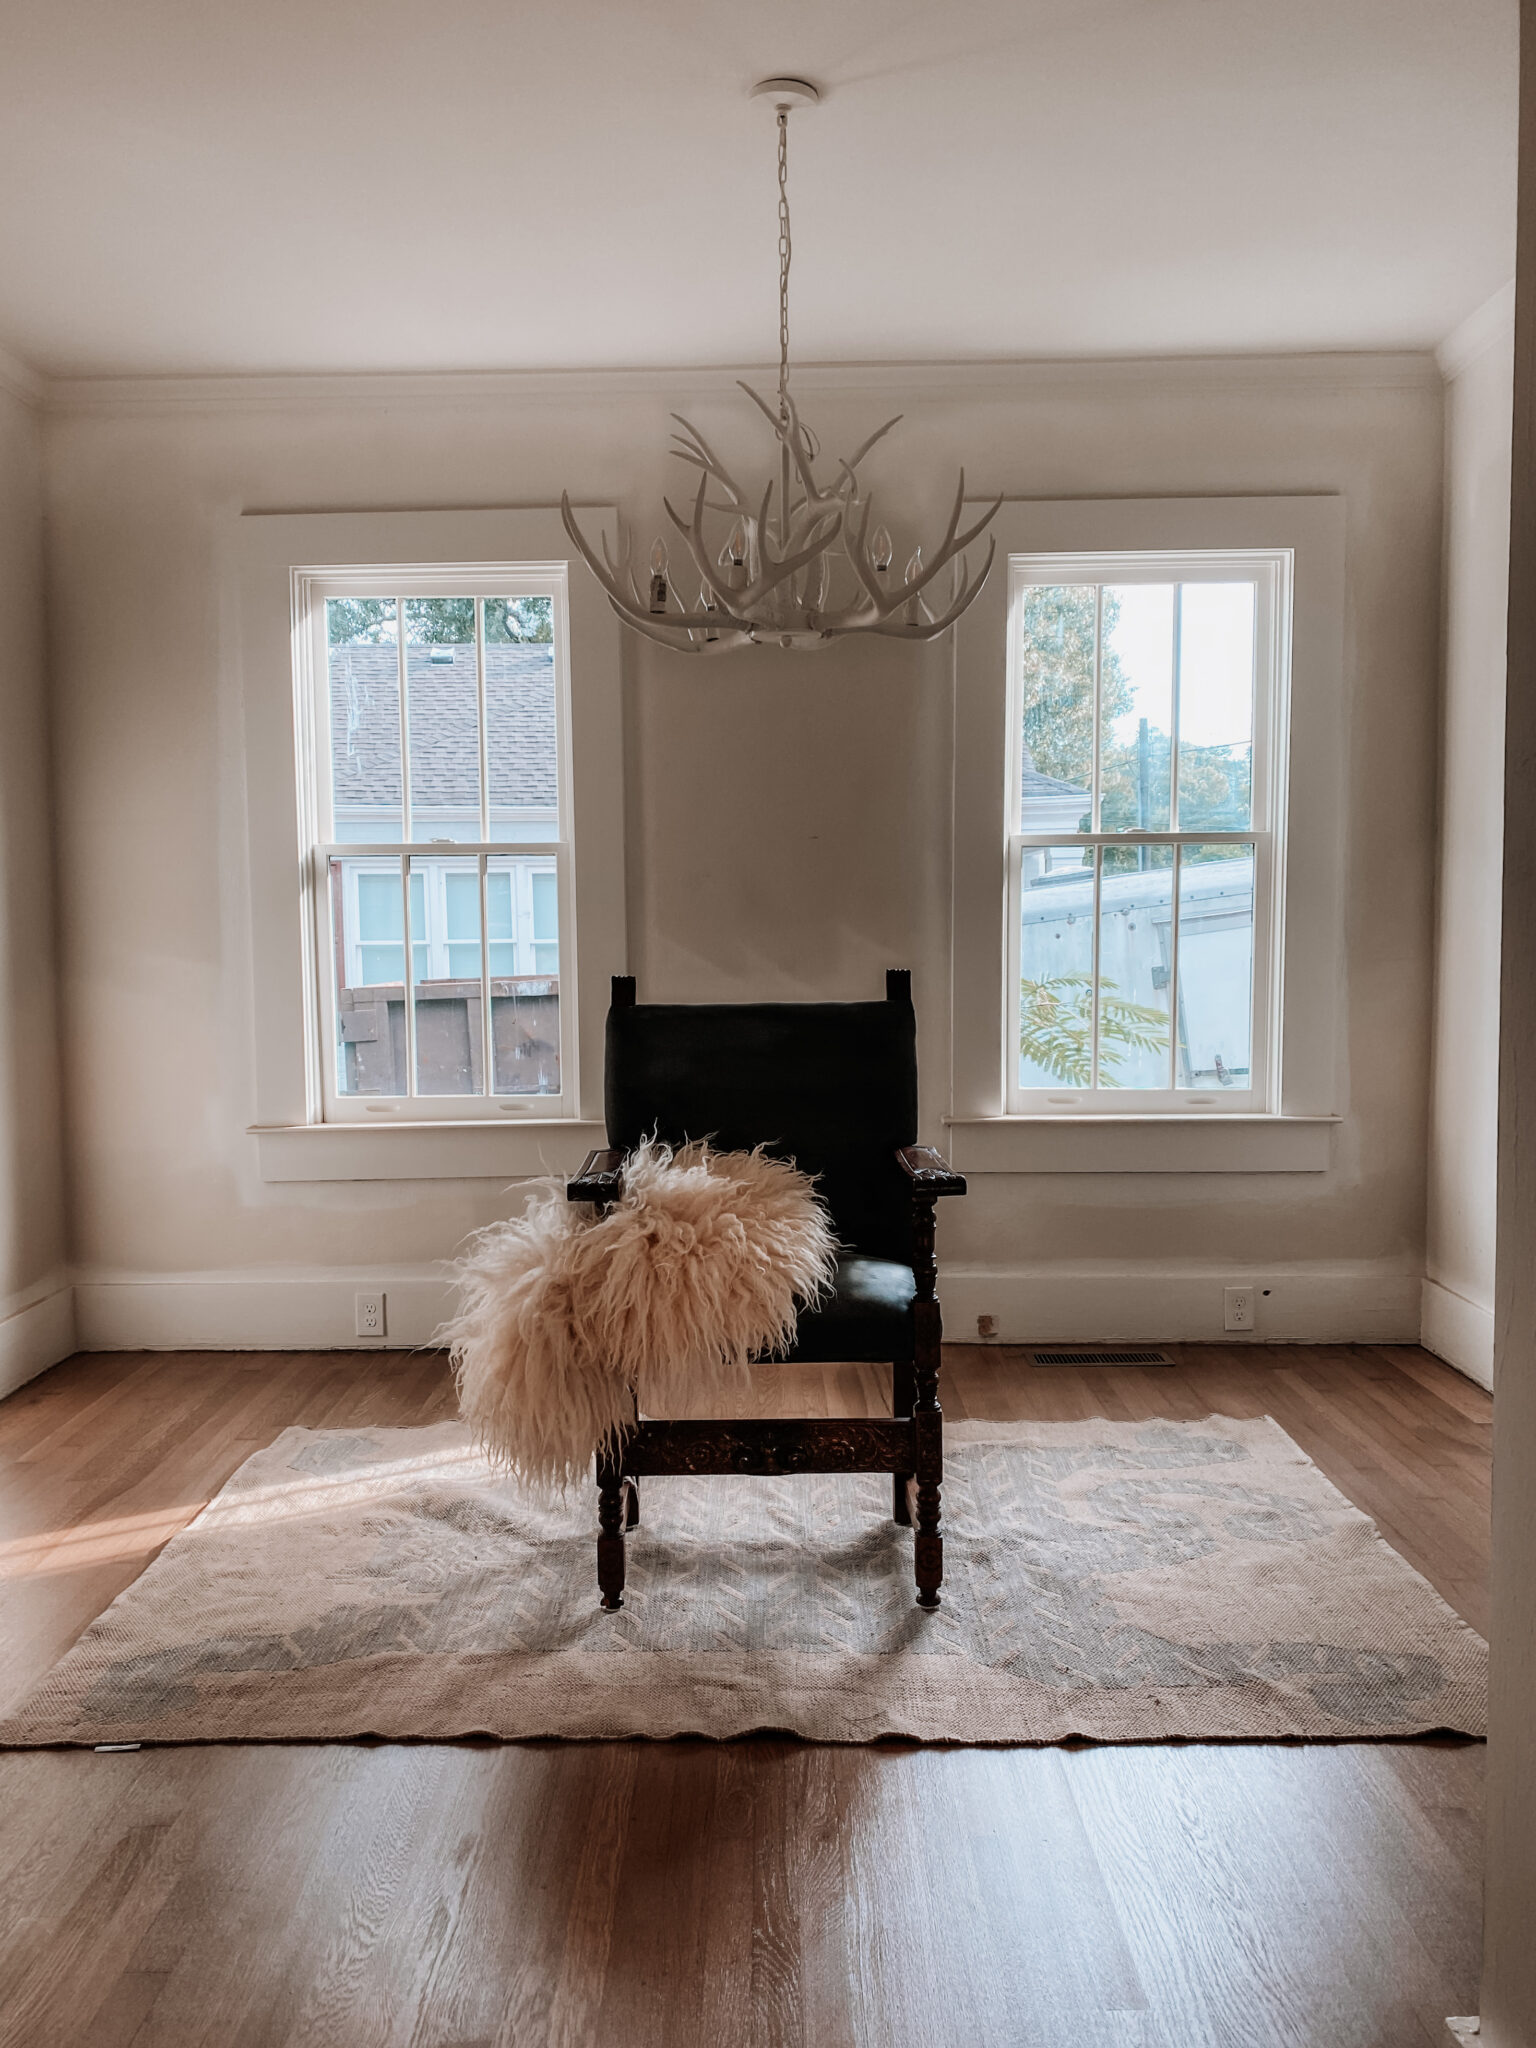
Side note: This sheep hide is from Five Mary’s Farm…linked HERE. Mary is the coolest and her ranch is beautiful. This is not sponsored in the slightest, but if you are interested in ethical farming she is a great follow!
Cheers to a wonderful week, and as always… keep it weird!
-Ab
+ view the comments


")
")